The Best Underwater Strobes Tested 2026
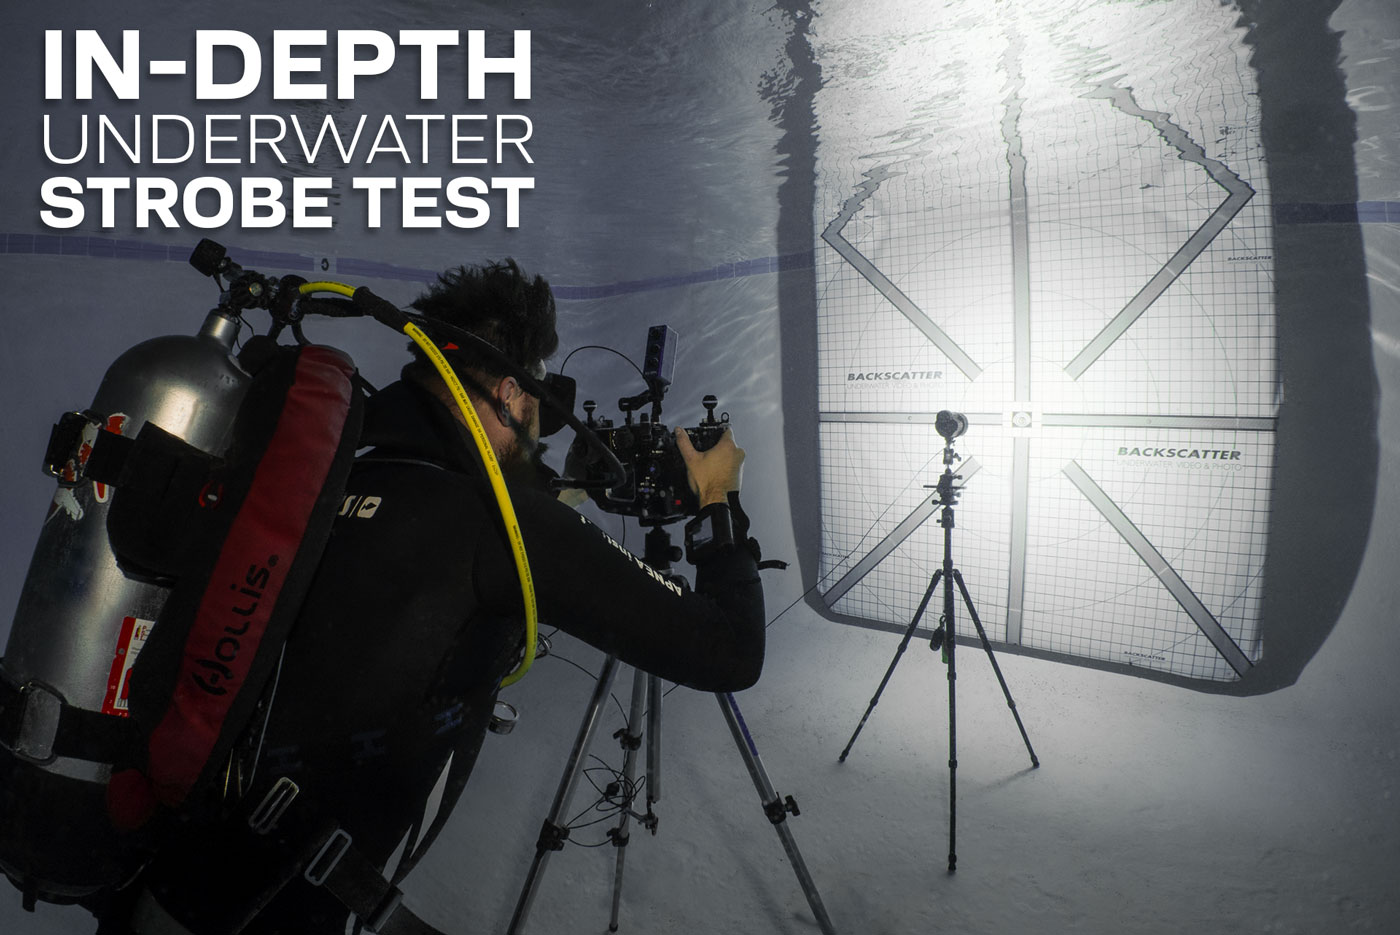
NOTE: This article is best viewed on a desktop screen rather than mobile.We Spent Thousands of Hours in the Lab and Underwater Strobe beam patterns are different in air and water due to refraction. We shot every strobe underwater so you can compare each strobe in the viewer below. It may or may not be a surprise, but there are no industry standards or governing bodies conforming the methods or the specifications for how underwater strobes are tested. Most strobe manufacturers don't define how their specifications are reached, which makes it difficult to do a direct comparison between strobes from differing manufacturers. For the purposes of this article, we used the same testing equipment, same conditions, and same testing criteria to give an apples-to-apples comparison so that you, as the consumer, can decide which strobe best fits your needs, shooting style, and budget. We also define explicitly how we ran our tests, what our criteria are, and insights on why we chose a certain methodology. We tested guide number (GN), beam pattern, recycle time, color temperature, weight, consistency of power levels, and flash duration. Like anything with underwater photography, we can get deep into the weeds. You’re welcome to join us for a deep dive into the nerd stuff or simply play with our handy charts for a visual comparison. Any Decent Photographer Can Make a Strobe Look Good Any strobe reviewer can take a good image by playing to a strobe’s strengths and minimizing its weaknesses. This review is not about using a particular strobe to capture a good image, but rather looking at the hard data. Using data rather than a few select images, we can better create an objective review, which is the main goal of this article. Shot with two Backscatter Mini Flashes. The Mini Flash 2 was designed as a macro strobe. The reason it worked for this photo is that it's deep and dark, so there wasn't much ambient light to overcome. Although it pulled this shot off, we'd never in a million years recommend the Mini Flash 2 as a primary strobe for big, wide angle scenes. Don’t just look at a pretty picture to judge a strobe, use our comparison viewer below to see brightness and beam pattern to find the best strobe for you. Nikon D850 | Nikon 8-15mm Lens | 1/125 | ISO 400 | ƒ8We tested over twenty strobes underwater (not all pictured) using the same criteria to make fair side-by-side comparisons.SKIP TO A SECTION Click a title to jump to a specific section. UNDERWATER BEAM PATTERN & BRIGHTNESS COMPARISON >> Use our awesome beam pattern comparison viewer to see the differences in brightness and beam patterns of all strobes shot underwater. GUIDE NUMBERS >> The maximum power of every strobe was tested in air and underwater. This chart will show you the brightest and dimmest strobes and everything in between. RECYCLE TIMES >> We timed every power level in our lab. This chart will show you the best strobes for fast action and the speed at which strobes can get back to their set power level. COLOR TEMPERATURES >> All strobes were measured with a color meter, and this chart will show you if a strobe tends to have warmer or cooler light to best match your shooting style and conditions. WEIGHTS >> We measured every strobe’s weight with batteries both in air and underwater to help verify manufacturer specs. CONSISTENCY OF POWER LEVELS >> A strobe’s power click stops should be even across the dial, however, in our tests, some strobes varied wildly. FLASH DURATION >> To freeze action, you need a short flash duration to match fast shutter speeds. We measured the duration of all strobes in our lab. TESTING METHODS >> This section dives much deeper into the why and how we conducted each test. BEAM PATTERN & BRIGHTNESS COMPARISONSELECT TWO STROBES TO COMPARE×Select two strobes from the drop-down menu to compare their underwater beam patterns and brightness. Slide the orange cursor left and right to make the comparison. © 2026 BackscatterSide-by-Side Underwater Beam Comparison Viewer Our beam pattern test was done at night in a pool, so the only light visible is from the tested strobe. All strobes were set to full power, and the same camera exposure settings were used for each image. We used slower shutter speeds for strobes with longer flash durations to show their max potential power output (see testing methods for more details). When sliding back and forth, compare BOTH the brightness and beam spread, especially the corner falloff of each strobe. A good wide angle beam pattern will have a smooth and gradual light falloff at the edges, especially in the corners. Make sure to compare strobes with diffusers as opposed to just the flash tube only. Probably the most dramatic difference is the Sea & Sea YS-D3 Duo, where with no diffuser, puts it more into macro territory with a narrow beam, however, the optional dome diffuser spreads the beam much wider and more evenly. Strobes with an even beam are much more forgiving on strobe positioning for wide angle, while spottier strobes require more precise positioning with the smallest tweaks making a big difference. These two images were shot with the same strobe: one in air and one in water. Water will narrow and brighten the strobe's beam.READ THE FULL EXPLANATIONBack to TopGUIDE NUMBERS×—Guide number measures the brightness of a strobe. This chart shows our underwater test results. A longer line equals brighter and is generally considered better. Keep in mind, this test doesn't factor in a strobe's beam spread, just the brightness in the center. © 2026 BackscatterGuide Number Chart Strobe specifications for brightness are given as a guide number (GN). It's used to determine the required ƒ-number for a flash exposure at a given distance and ISO. With distance and ISO remaining equal between two strobes, the higher the GN, the more powerful the flash. Manufacturers usually quote guide numbers at a distance of one meter at ISO 100. With these two variables being constant, the resulting guide number can be used to determine the brightness of a strobe. Guide numbers and ƒ-numbers are measured in what are called stops. Each of these numbers are 1 stop apart from each other: 2.8, 4, 5.6, 8, 11, 16, 22, 32, 45. A stop is an exponential scale, meaning that 1 stop brighter is double the amount of light, 1 stop darker is 1/2 the amount of light. This means that a guide number of 11 is not 3 greater than 8. It means GN 11 is double the brightness of 8. A GN 16 is 4 times the brightness of 8. And you guessed it, GN 22 is 8 times the brightness of 8. Some manufacturers quote guide numbers in air, some in water, and some with no indication of air or water. We tested guide numbers in air, in water, and listed the manufacturer specification (if stated) for comparison. Underwater guide number is the proper specification to consider because water will magnify and concentrate a flash beam compared to shots in air. A higher number is brighter and generally considered better when comparing strobes in the same price and performance range. The exact guide numbers are not what's important, and we are not trying to call out the manufacturer's guide number specs. The important thing to look at is the relative difference between two different strobes tested in the same manner to make a fair comparison. Most strobes were pretty close to their quoted guide number when tested in water, however, some strobes tested were wildly off their claimed numbers, with some only at 25% of their claimed brightness. Others surprised us by grossly understating how bright their strobes actually are. READ THE FULL EXPLANATIONBack to TopRECYCLE TIMES×Click strobes in the legend to hide/show on the chart. Recycle time is how quickly the strobe is ready to fire. Each dot shows the recycle time at full output for each power setting. The ideal strobe should have the brightest flash (tallest line) and the quickest recycle time (shortest line). © 2026 BackscatterRecycle Time Chart Recycle Time is how quickly a strobe can fire again after a shot. A faster recycle time means you're less likely to miss a shot because your strobe is still charging. For our recycle time tests, we measured both the full recycle time and the fastest time. Full recycle time is how long it takes the strobe to fully recharge to the same brightness as the first shot. Fastest recycle time is how soon the strobe will fire regardless of power output. On the chart, the dots display the full recycle times for the power level tested. By hovering over the dot, a tooltip will appear, showing both the full recycle time and guide number and fastest recycle time with the guide number of the second shot. This chart contains a lot of comparative data, so we included a legend at the bottom. By clicking the strobe’s name, it will toggle it to appear or disappear on the chart. Use this to compare a manageable number of strobes. The horizontal axis is time, with a lower number being faster and a better result. The vertical axis is brightness (guide number), with a higher number being brighter. It's common to hear discussions about recycle time where someone might say "X strobe is so much faster on recycle time than Y strobe" but completely ignoring the fact that the strobes could be at different brightness levels. As the power level on a strobe is turned down, the recycle time gets faster. To accurately compare the recycle time of two different strobes, both strobes need to be at the same brightness. For this reason, we included recycle times at all power levels, so a direct comparison can be made easily between two different strobes. To compare two strobes, locate the guide number on the side of the chart and then look horizontally to see the time where it intersects with that particular guide number. READ THE FULL EXPLANATIONBack to TopCOLOR TEMPERATURES×Color temperature measures how "cool" or "warm" a strobe's light appears. Color temperature is subjective and a preference of the photographer. The black dot represents the stated color temperature of the strobe from the manufacturer. The green bar shows the strobe's measured color temperature range across different power levels. A long green bar will indicate a larger color temperature variance, and a shorter green bar will indicate a smaller color temperature variance. © 2026 BackscatterColor Temperature Chart Color temperature refers to the color of the light emitted from a strobe, measured in Kelvin. A lower color temperature (4500-5000 K) looks warmer (orange-yellowish), while a higher color temperature (6000-7000 K) looks cooler (whitish-blue).Our graph shows a color temperature range from a warm, orange 4000 K to a cool, blue 8000 K, with this figure representing the color shift across this spectrum. Use the chart to compare strobes by what is warmer and what is cooler as a range rather than by a single value. Color temperatures are subjective, and the ultimate choice is up to you as the photographer as to what look you want for a particular photo and shooting conditions. Some strobe brands offer color filters or tinted diffusers, letting shooters choose color temperatures that suit their scene and style. In the chart, the black dot represents the stated guide number of the strobe from the manufacturer. The green bar shows the range we measured from the warmest color temperature to the coldest color temperature recorded across the power levels. If you hover over the bar on the chart, a tooltip will appear with the readings for the manufacturer's stated color temperature, the color temperature measured at full power, the range from the warmest to coldest temperature, and the difference in Kelvin between the warmest and coldest measured temperatures. The green bar shows the strobe's measured color temperature range across different power levels. A long green bar will indicate a larger color temperature variance, and a shorter green bar will indicate a smaller color temperature variance. The color temperature testing results cover the range of power levels of a strobe rather than just one pinpoint power level, as color temperature can change with power level changes. We highly recommend reading the detailed explanation of our color temperature tests. This will help you gather a better understanding of how a strobe’s color temperature can vary and explain why you might want to choose a warmer or cooler color temperature for certain shooting situations or based on personal preference.READ THE FULL EXPLANATIONBack to TopWEIGHTS×We measured strobes with batteries both in water (blue) and in air (green). A lighter strobe may be better suited for travel but might have a lower power output. More powerful strobes might be larger in size and weight. © 2026 BackscatterWeight We measured the weight of every strobe with batteries installed in both air and in water, accurate down to one ounce. Freshwater was used for the in-water tests as the difference at such low weights is negligible between fresh and saltwater. Floats can be added to compensate for heavier strobes, however, a lighter in-water camera housing will have a greater overall impact on the system’s buoyancy. READ THE FULL EXPLANATIONBack to TopPOWER LEVELS×Each strobe was tested at every power level setting. The ideal strobe would have a power dial that produces evenly spaced power with each click stop. Click a dot to see the difference in power of each setting. © 2026 BackscatterConsistency Of Power Levels In addition to testing the maximum output of the strobe, we also tested the guide number at every power level. We are looking for consistency between different power levels. Power levels are usually specified in full or half stops by the manufacturer. The dots on the left side of the chart at FULL represent each strobe at its highest setting, with the dots to the right representing each click of the power dial moving down from maximum power. The solid vertical lines represent 1 stop of light loss as the chart moves to the right. If you hover over each dot, a tooltip will appear and indicate the difference from one power level to the next. Look for consistent spacing between power levels for a strobe. Consistent spacing between power levels allows the photographer to more easily control the exposure. One or two-tenths of a variation of what's expected is not a concern, but more than a third of a stop variance leads to inconsistent power levels between dial settings. Most strobes were fairly consistent in power level adjustment, however, some were wildly off, so much so that multiple power dial changes yielded little output difference. READ THE FULL EXPLANATIONBack to TopFLASH DURATION×Flash duration is how long the flash tube is lit when the strobe fires. A shorter flash duration is preferred over a longer one. Strobes with long flash durations appear dimmer when using faster shutter speeds. © 2026 BackscatterFlash Duration Flash duration is probably one of the more esoteric specs of a strobe, but it is becoming more important to pay attention to as the flash sync speeds of cameras become increasingly faster. Flash duration is how long the flash tube is lit up when the strobe fires and can vary from hundredths to thousandths of a second. If the flash duration is slower than the shutter speed being used, the flash will be cut off by the shutter speed of the camera, and the flash will appear diminished in the photo. Flash duration is measured with a flash meter, and the time is expressed in the same way as shutter speed. We measured the flash duration at the maximum power output of the strobe. As the flash power is turned down, the duration gets shorter. For the strobes that have the longest flash durations, lowering the flash output by 1 click in most cases makes the strobe duration fast enough for most flash sync speeds above 1/200 second. In the chart, green bars are strobes that are faster than 1/400 second, meaning most cameras can sync with them without reducing output because of the flash duration. Yellow is slower than 1/400 second but faster than 1/200 second, meaning some faster syncing cameras may run into reduced outputs at higher shutter speeds. Red indicates below 1/200 second, and you will need to be mindful of your shutter speed when shooting these strobes at full power to realize the whole power output. READ THE FULL EXPLANATIONAll Content Copyright Backscatter 2026. No data or images may be used or republished without direct written permission from Backscatter. Back to TopTESTING METHODSDetailed Explanations for Our Testing MethodsBy testing strobes underwater using the same set of standards, we can get a more accurate understanding of what each strobe is capable of.Guide Number and Beam PatternTwo directly related and inseparable attributes to determine the quantity and quality of light Guide number (the brightness of a strobe) and beam pattern (the spread and evenness of the beam) are directly related. A strobe can have a relatively high guide number, but a narrow beam pattern that is not well suited for wide angle shooting. This can be put into a smaller package and at a lower price than some of the larger strobes with an evenly spread beam. But it takes a lot of energy to spread a beam wide because the light is covering such a larger area. This requires bigger strobes with bigger flash tubes, bigger batteries, and more capacity. Guide number and beam pattern both need to be looked at together to get a good idea of the quality of light, not just the quantity. GO BACK TO THE GUIDE NUMBER CHARTWhat is a Guide Number? Strobe specifications are usually given as a guide number (GN). If you take a guide number and divide it by distance, you get the f-number needed for proper exposure. Basically, it is the aperture needed for a correct exposure at a specific distance and ISO. Manufacturers usually quote guide numbers at a distance of one meter at ISO 100. With these two variables being constant, the resulting guide number can be used to determine the brightness of a strobe. This means that a higher GN equals a brighter strobe output. Testing is always done at the center of the beam pattern, which, most of the time, is the brightest spot of the beam. Most, but not all, follow this metric. Therefore, it is vitally important not to just know what the guide number is, but what distance it was measured at and at what ISO. Without that information, it is useless to compare two guide numbers. For example, if it's measured in feet instead of meters (which is a closer distance), the resulting guide number is higher. If it's measured at ISO 200 instead of ISO 100, the guide number is two times higher, however in reality both would be the same brightness. If it's measured in air, it will be lower than if measured in water due to refraction. Some manufacturers don’t specify whether their guide numbers were measured in air or underwater—so we tested both. Be sure to focus on the underwater guide numbers for the most relevant comparison. At Backscatter, for all of our testing, we measure guide numbers at one meter, ISO 100, which is the general topside industry standard for quoting a guide number specification for a speedlight. Since most underwater strobe manufacturers don't specify if the guide number was tested in air or water, we did both for comparison. That being said, underwater photographers should only be paying attention to the guide numbers and beam patterns generated in water. It is important to test beam pattern and brightness underwater where the strobe is actually used. In water, a strobe’s beam is concentrated, providing a higher guide number than in air. Strobe beam pattern is also dramatically different underwater due to refraction.Don't Get Lost in the Small Details of Guide Numbers The exact guide numbers are not what's important, and we are not trying to call out manufacturers' guide number specs. We don't know how it was tested (air or water) or, for some, they don't even quote guide number specifications. The important thing to look at is the relative difference between two different strobes tested in the same manner to make a fair comparison. Don't get too hung up on the details of the exact guide numbers down to the very last 1/10 of a stop of similar brightness strobes. We live in an analog world and try to measure it with digital instruments. There's always going to be small deviations in testing that could include small and imperceptible differences in the actual strobe output from shot to shot, and minute differences in one testing session to another. Anything within 1/10 to 2/10s of a stop will not make a difference in a real-world scenario, so don't sweat that level of detail. If it's that close, you are better off looking at the beam pattern comparison at that point to help get a better sense of the performance of a strobe. All that being said, most strobes were pretty close to their quoted guide number when tested in water using the ISO 100 and one meter rule. However, there are a few that were wildly off and nowhere near the claimed guide number in air or water. What is a Stop? It's a Measurement of Light... Guide numbers are basically aperture numbers, also known as stops, ƒ stops, or ƒ numbers, such as 2.8, 4, 5.6, 8, 11, 16, 22, 32, 45. These numbers are a ratio of the length of a lens compared to its opening. This system was devised so that the apertures (or ƒ stops) could be standardized across all lenses so that, in theory, the photographer would get the same exposure at ƒ8 on a 35mm lens and ƒ8 on a 90mm lens, despite the physical opening of the aperture being larger on the longer lens. You can look at the front of a lens and see that the actual aperture hole size is physically different when comparing a 35mm lens to a 90mm lens, however, it lets in the same amount of light to the camera. This is a very brief and simple explanation, there are plenty of articles and photography books that are beyond the scope of this article for those who want to dive deeper into this topic. The lens on the left is a 35mm, and the one on the right is a 90mm. Both of these lenses are set to ƒ8, but you can see the physical diameter of the opening is a different size. This is because apertures (or ƒ stops) are a ratio of lens length to opening and let in the same amount of light at a certain ƒ stop no matter what lens is being used.Guide Numbers Are an Exponential Scale In photography, light is measured in what is called stops. Each of these ƒ numbers are 1 stop apart from each other: 2.8, 4, 5.6, 8, 11, 16, 22, 32, 45. A stop is an exponential scale, meaning that 1 stop brighter is double the amount of light, 1 stop darker is 1/2 the amount of light. This means that a guide number of 11 is not 3 greater than 8. It means GN 11 is double the brightness of 8. A GN 16 is 4 times the brightness of 8. And you guessed it, GN 22 is 8 times the brightness of 8. To a layperson, it might be tempting to think a strobe with a GN 33 is 1 better than GN 32, but in reality it is less than 1/10th of a stop brighter. Light meters only measure down to 1/10th of a stop. The difference is practically immeasurable, and no one would ever be able to tell a brightness difference when comparing two photos. Light meters measure in full stops plus a difference listed in 1/10th increments. Manufacturers typically list guide numbers converted to a single number. In our test results, we list the converted single guide number in our chart and also full stops plus tenths in 1/10 increments. When comparing two guide numbers, it is best to use full stops plus tenths to calculate the difference. How We Measure Guide Number To measure the guide number in water, we use a Sekonic L-858D-U flash and light meter in a custom-made underwater housing. The strobe is centered and squared up on the light meter sensor and placed one meter away underwater in our test pool, set at ISO 100. The flash is fired, and a reading is taken. Multiple readings are taken to ensure accuracy and consistency. To measure the guide number in air, the same setup is used, just without the custom underwater housing in our studio. In our testing in air, we have discovered that there is approximately a 0.3 to 0.5 stop loss of light from our light meter housing. For all of our underwater measurements, we added 0.4 back to the numbers we read off the light meter for a truer representation of the guide number underwater. In order to test strobe brightness underwater, we made a custom housing for our light meter. We found the housing resulted in 0.3-0.5 stop loss of light during our tests, so we added this back into the results to make them more accurate. Guide numbers can't be looked at in isolation as a sole determining factor in whether one strobe is "better" than another. In America, where one is good, two is great, and three is fantastic, it's tempting to think that way, but it doesn't tell the full story. The guide number is important, but so is the beam pattern and what your intended use case is for example, macro, fish portraits, general wide angle, giant reef scenes, or close focus wide angle. For macro a ton of light isn't needed for the super close working distances so a very bright guide number of a large strobe isn't very relevant. For big wide angle shots of the largest reef scenes or shipwrecks, a lot of light with a nice even beam spread is needed to fill the entire scene. Big scenes require a lot of light and an even beam spread to be lit properly.Sony a7R V | Canon 8-15mm Lens | 1/250 | ISO 640 | ƒ14For dedicated macro shooting, a super bright strobe is unnecessary due to the closer working distances.Sony a7R V | Sony 90mm Lens | 1/250 | ISO 200 | ƒ16Guide Numbers and Beam Patterns for Underwater Strobes Can't Be Compared in Air If you remember from basic scuba class, when looking through a mask, things appear 33% bigger and closer. This is called refraction, and it is the interaction of light when it goes from water to air. Basically, water is kind of like a magnifying lens. It will take light, condense it, and make it narrower and more concentrated, resulting in a narrower and brighter beam compared to in air. In theory, it would equate to about a 1-stop gain in guide number in water compared to air. However, internal strobe optics can either concentrate the beam further or go a long way to cancel out the refraction to spread the beam pattern underwater. Whether the strobe has a flat front element versus a domed element will also affect the beam angle. Flat elements concentrate and narrow the light in water compared to air. Domes will cancel out some or most of the effect of the water magnification and will help maintain a wider beam pattern comparable to what one would have in air, but at the cost of a lower overall guide number in water. For all of these reasons, and the main reason that we are shooting all of this underwater, a strobe’s beam pattern and brightness mean absolutely nothing in air and must be tested and compared in-water. Diffusers spread the strobe’s beam, making it wider and more even. There are many exciting options using different shapes and color temperatures. This wider beam does come at a cost of light loss of 0.3 to 2 stops depending on the diffuser’s material and design. This is a perfect example of why beam pattern tests cannot be performed in air. The Sea & Sea YS-D3 Duo strobe has internal optics to concentrate and shape the beam pattern underwater, which results in a much higher guide number and radically different beam pattern than in air. The Sea & Sea YS-D3 Duo has an optional dome diffuser designed to spread the beam and turns a stock macro-centric beam pattern without a diffuser into a highly usable tool for wide angle photography.Watt-Seconds--A Poor Metric to Judge Strobe Brightness You might hear some strobe manufacturers quote a specification in watt-seconds for the power of the strobe. Watt-seconds are a measure of electrical energy going into the flash tube, not the amount of light coming out, and therefore are a poor metric to rely on to try to compare two different strobes for brightness. It does not account for the inefficiencies of converting electrical energy to light, which include flash tube choice (round versus straight), reflector design, optics, or circuit design. Watt-seconds are virtually impossible to measure by a third party and therefore are unverifiable. Even if it were verifiable, it's not what is important to a photographer. It's not a measurement of light. It means nothing to a photographer, as there's no watt-second dial on a camera. The brightness and beam spread are what are important to a photographer. While it can be argued that, in general, more electrical energy will result in a brighter output, that only works if all the other many factors that go into the design of a strobe are identical. Back to TopBEAM PATTERNThe Quality of Light For wide angle, a beam with a wide and even spread is king. Not only will it light the scene more evenly than a more spotty strobe, but it also makes strobe positioning way more forgiving compared to one with a tight beam. We’d gladly take a less powerful but wider and more even beam strobe than one that is bright and spotty for wide angle. It takes a lot of power to spread a beam to make an even and wide spread. This is why most of the wide angle centric strobes tend to be larger, have bigger batteries, capacitors and flash tubes, are heavier, and have a higher price tag. GO BACK TO THE BEAM PATTERN VIEWERWide angle strobes should have a wide and even beam, which makes lighting large scenes more forgiving than a spottier strobe.Sony a7R V | Canon 8-15mm Lens | 1/125 | ISO 250 | ƒ14 For shooting macro, the opposite strobe specifications of wide angle are preferred. Macro critters tend to be camouflaged and hide away in tight places. The way to get a macro critter to stand out from its environment is to create shadows to make it "pop" off its background. Blasting it with a ton of light from a very wide-beam strobe, or with dual strobes, eliminates shadows, and it won't stand out from its environment very well, generally leading to a less pleasing photo with people playing Where's Waldo, trying to find the critter in a sea of visual cacophony. This is why a smaller, less powerful, and narrower beam strobe is a better choice for macro photography. It can get into tighter places, weighs less on the camera rig, and doesn't need to be powerful (even with the high apertures of macro photography) because macro photography is done very close up. Sometimes an extremely narrow beam (like one from a snoot) is the appropriate choice to highlight the critter and nothing else, with tons of shadows for an extra dose of drama and isolation from its surroundings. A narrower beam pattern allows camouflaged critters to stand out from their environment.Canon 1DX II | Canon 100mm IS Lens | 1/250 | ISO 200 | ƒ14Differences in Flash Tube Types There are two different types of flash tubes--round and straight. In general, but not always, round tubes natively without a diffuser will produce a wider, more even beam pattern, whereas a straight tube natively without a diffuser will have more of a rectangular shape. Round tubes are less efficient and have longer flash durations, whereas straight flash tubes are more efficient and can have brighter guide numbers for the same amount of watt-seconds of energy. The round tube versus straight tube debate can't be boiled down to one being always better than the other. There are many other factors in strobe design that go into making a pleasing quality of light than just flash tube type. Reflector design, strobe optics, and diffusers all play a role in the quality of light coming from a strobe. In the end, the best comparison is to look at the beam spread and brightness in the comparison viewer and make a direct comparison of one strobe to another regardless of tube type. You might have seen that some video lights feature a burst mode, which is labeled as a "flash". These are not anywhere bright enough to be compared to a bona fide xenon flash tube. We have an entire separate article on video lights versus strobes for photography. Read our article to learn why strobes are the best tool for the job for most photos.How We Did Our Beam Pattern Test Our beam pattern test was done at night in a pool, so the only light in the shot is from the strobe itself to give the truest representation of the beam pattern. The rings on the pattern are at 30, 60, 90, and 120-degree increments. Strobes were placed one meter away from the center of the target and fired at full power. The camera was placed 1.5 meters away from the strobe and was shot with the Sony a7R V with the Sony 28-60mm and Nauticam WWL-1B lens. Exposure settings were 1/200 second, ƒ22, ISO 100 for all strobes, as most modern mirrorless cameras have at least a 1/200 second sync speed. Strobes that have a flash duration slower than 1/200 second at maximum power were also shot at 1/100 second so that the difference in flash exposure from 1/200 second to 1/100 second can be seen. Since the exposure settings on the camera are the same for each strobe, overall brightness can be directly compared alongside beam pattern. Flash duration is discussed in more detail later in this article. The images were all shot at 5500 K white balance in camera, white balanced in post in the same spot in the center of the image, then converted to black and white. We did this because it was difficult to see the beam pattern with the water filtering the color of the strobe, especially on the edges where the light falloff occurs. Weaker strobes looked more cyan, whereas brighter strobes looked closer to how it looks in air, skewing perceptions of beam pattern falloff. By white balancing and converting to black and white, an apples-to-apples comparison can lead to better insights on comparing beam patterns. When comparing similar brightness strobes, don't get lost in squinting at which one might be ever so slightly brighter, as this won't make any difference in the practical real world. Look at the overall beam pattern to draw a better conclusion. We purposely did not try to call out what specification a beam angle should be from our testing. In looking at the testing results, we can only guess and ballpark what we think it might be, as it's a highly subjective call. Many of the strobes in the test have a gradual falloff that's hard to define in numbers, while others have hard edges and are more easily defined. There's no defined meaning of what a beam angle is. Is it until there's no light left at all? Is it when there is a certain amount of light falloff from the center but still visible? We have no idea how the beam angles are quoted by the manufacturers, so we think the best comparison is to just look at the photo taken on the target and ignore any beam angle number reference. Side by Side Comparison Viewer Make sure to compare strobes with diffusers as opposed to just the flash tube only. Probably the most dramatic difference is the Sea & Sea YS-D3 Duo, where, with no diffuser, it kind of puts it into macro territory, but the dome diffuser addition spreads the beam nice and wide. Comparing The Beam Comparison Viewer and Guide Number Measurements When looking between the beam comparison viewer and the guide number chart, you may notice some differences between what one might expect from the guide number the flash meter is reading, and how bright it looks in the comparison viewer when comparing two strobes. Guide number is measured at the dead center of the beam, which is usually the brightest spot. This is where a strobe with a spotty beam pattern can have a brighter guide number in the center but then "appear" to be less bright when compared to something that has a more even beam across the board. Factors such as color temperature, flash duration, shutter speed, and sensor performance can all have an effect on how much flash and its perceived brightness is being captured by the camera, regardless of a measured guide number. This is why you may see some differences between the visual representation in the photos versus the measured numbers in the guide number chart when comparing two strobes with similar guide numbers, and why your results may vary with a particular camera. This is why we test with the same equipment, with the same criteria, to get the most consistent and comparable results. While most of these differences are minor (if any) and are extremely rare to occur, this difference between the beam comparison viewer and guide number chart is most noticeable with the Isotta Red64. This is the highest measured guide number strobe we tested. However, in the beam pattern test, it appears less bright than what the guide number would suggest. The industry standard for flash duration measurement is t0.1, which measures the brightest 90% of the flash duration. We saw improvements in brightness all the way down to a shutter speed of 1/60 second, making it more consistent with the recorded guide number in water. With all that being said, the Isotta Red64 is still grouped at the top of the list of the brightest strobes we ever tested, even if it visually appears to fall slightly short of the measured guide number. For all these reasons, we believe the best way to judge a strobe's beam pattern and brightness is to look at what comes out of the camera and pay more attention to the comparison viewer. When deciding on which strobe to buy, if things are really close, go with the one that has the features that appeal to you rather than obsessing over minute differences in guide number specs. Back to TopRECYCLE TIME In theory, recycle time seems like a pretty simple concept. But the reality is much more nuanced. What is the definition of recycle time? There isn't one definition, and we don't know how the manufacturers determine recycle times. So let's get into the details of recycle time, why it's important, and how to compare different strobes against each other. GO BACK TO THE RECYCLE TIME CHARTWhat is a recycle time? It seems simple that a recycle time is the time between when a flash can fire one shot after another. But what is the power level or guide number of that second shot when compared to the first? Capacitors in a strobe retain high-voltage electric energy and need to be recharged after every shot. Some strobes will allow a flash to fire as soon as there is any level of voltage in the capacitors, no matter how low it may be, while others will wait until there is a bit more in the capacitors. The level of brightness of the strobe for a subsequent shot will be directly related to how much voltage the capacitors have available. Is the recycle time determined by when the flash can first fire anything, regardless of what power level comes out on the second shot, or is it when the flash can get back to the max power level? What does the ready light mean? Is that when there's the minimum amount of energy in the capacitors and the strobe can produce a shot, or is it when the capacitors are fully charged? Or somewhere in between? Because no manufacturer states how they calculated their recycle time or exactly what the "ready" light means, we have no idea. Why is a Fast Recycle Time Important? Having a fast recycle time is not just about capturing super fast-moving subjects, which for most general underwater photographers is not what they are taking pictures of all the time. In nature photography, moments are often fleeting, with not much time to get the perfect shot of a subject. A turtle might not be moving fast, but a quick recycle time and continuous shooting could be the difference between getting a shot with a flipper in front of the face and a totally clean shot worthy of putting on a wall. Or getting the perfect position of a stingray while it is actively feeding. Or having a sailfin blenny spitting sand or displaying its fin. Or a model swimming through a scene in the background looking for the perfect position. Continuous shooting with rapid recycle time is key to all of these types of shots, and is how pro shooters get those very special ephemeral moments captured in time. The more shots taken in a short period of time will increase the yield of keepers. How We Tested Recycle Time For our recycle time tests, we measure both times--quickest fire for the second shot no matter what the output is, and getting back to the full output of the strobe. To measure flash recycle time with strobes, an Arduino Nano microcontroller module was used in conjunction with a photoresistor. An Arduino script was written to start a timer when a flash of light was detected and stop the timer when a second flash of light was detected. All strobes were connected fiber-optically to a Nikon Z9 camera firing at maximum continuous shooting (20fps on continuous high). A Sekonic L-858D-U light meter was placed 1 meter away to measure power output in these tests. Measurements of fastest recycle time were made by calculating the time between the initial flash and the first subsequent flash detected. Measurements of full-to-full recycle times were made by measuring the time between the initial flash and the time of a subsequent flash that measured the same full power guide number on the light meter. It is difficult to manually time a shot to get the exact same guide number without letting the strobe recycle too long, giving a falsely long recycle time. For this reason, we used getting to within a ¼ stop or less of the full output of the strobe as our standard for the full recycle spec. This is why you might see a slight difference between the first and second guide numbers on the full power test. All guide numbers shown in the chart are underwater guide numbers. These recycle time tests were performed in air. We have a lookup table for each strobe at each power level that we recorded for both in air and underwater guide numbers to convert the air number to an underwater guide number. Some might be tempted to discount strobes that have lower guide numbers on subsequent shots as being inferior or somehow cheating on their specs. We completely disagree with this line of thought. In the heat of the action, where quick recycle is mandatory, we'd rather have some light coming out of the strobe as opposed to no light at all. It's actually a benefit of rapid firing and diminishing output when closing distance on a moving subject. Higher flash exposures will happen when further away, and the strobe will have less output when moving closer in a burst sequence. This is a technique used by many professional underwater photographers to "bracket" their flash exposure while closing distance, so much so that it's actually a feature and shouldn't be considered a bug. Make Sure to Compare Apples to Apples Between Strobes For Recycle Time It's common to hear discussions about recycle time where someone might say, "X strobe is so much faster on recycle time than Y strobe, so I'm going to get that one!" but completely ignoring the fact that the two strobes could be so vastly different from each other in brightness. As the power level on a strobe is turned down, the recycle time gets faster. To do an accurate comparison test between two different strobes, both strobes need to have the same brightness. Only then can a meaningful comparison be made. Our recycle time test also includes recycle times at all power levels, not just max output, so direct comparisons can be made between two different strobes. It also shows how fast the recycle is in rapid firing the strobe with fast-moving action at lower power levels. Back to TopCOLOR TEMPERATURE Color temperature is a hot topic among underwater photographers, who, as we know, have no shortage of strong opinions. It has been known to spark heated debates and may have even fueled a bar brawl or two. That being said, color temperature is a subjective spec. Some people prefer warmer colors, while others prefer cooler ones, depending on the shooting situation. In our testing, the variables of high-voltage capacitors heating xenon gas discharge tubes to levels that turn that gas into plasma and create light, when combined with adjusting power levels, can sometimes lead to a degree of variability from power level to power level and even shot to shot. This makes it almost impossible to quote a single color temperature number for the entire range of output for a strobe. We highly recommend you read the detailed explanation of our color temperature tests below to gather a better understanding of how strobes can be variable and why you might want to use a cooler or warmer strobe in certain situations. Let the brawl begin… GO BACK TO THE COLOR TEMPERATURE CHARTSColor Temperature is all about the Background Color Digital cameras have white balance adjustments to compensate for different color temperature lighting conditions. For underwater photography, the foreground is lit by the strobe, and the camera will adjust for the color coming from the strobe for the foreground. Because of the difference in color temperature for a foreground lit with strobe light and an extremely different and much cooler color temperature ambient light background, the "correct" look for the foreground will alter the background color of the water. If the camera doesn't quite get the color right for the foreground, it can be changed in post very easily and non-destructively if the image was shot in RAW format. Warmer colors (4500-5000 K) can turn greenish water backgrounds more bluish. This is usually what you see in more temperate waters or in the shallows of clear tropical waters. In tropical waters, it can make a background color that looks like it was shot at a deeper depth than it really was and clean up some of the cyan color in the shallows. A temperature of around 5500 K is considered daylight color temperature and will produce a more faithful representation of the colors in a scene. Higher color temperatures in the 6000-7000 K range have more of an ever so slightly bluish tint to them and will have a greater reach with further distance into a scene. It also has the benefit of making a photo taken at deeper depths look like it was shot at a shallower depth due to the difference in color temperature not being as great between the foreground strobe light and background ambient light. In our own photos, we can see that a 500 K swing in color temperature is a much more noticeable difference from 5000 K to 4500 K, but a 500 K difference from 5000 K to 5500 K or 5500 K to 6000 K is not nearly as much of a change. In general, but not always, round flash tubes tend to be warmer, and straight tubes tend to be cooler. The color temperature will also depend on reflector design and any colored optics in front of the flash tube or the color of the tube itself. It takes more energy to produce a warmer color temperature than a cooler one if everything else is equal, usually resulting in a lower guide number for warmer strobes versus cooler ones. Filters and Diffusers Can Make Color Temperature What You Want The good news is that for many strobes on the market, color filters and tinted diffusers are available to not only change the beam angle through diffusion, but also offer other color temperature choices for either personal preference or certain shooting conditions. 6500 K FLASH COLOR TEMPERATURE4500 K FLASH COLOR TEMPERATUREUsing a warmer diffuser in the range of 4500 K will make a low-vis greenish background look more blue. For best results, set the camera’s white balance to the temperature of the diffuser or strobe being used, especially when it's on the warmer side, for a better viewing experience during playback and easier editing.Canon EOS R3 | Canon 8-15mm Lens | 1/200 | ISO 200 | ƒ18How We Tested Color Temperature We measured color temperature in air to avoid any influence of the water filtering the color temperature over distance in water. Strobe light will be affected by distance in water due to the different light wavelengths being filtered out. We tested each strobe's power level at a distance of 1 meter with a certified and calibrated Sekonic C-7000 spectrometer. At very low power levels (around a GN of 2.8 and lower), the output is too low for the spectrometer to register a color temperature reading, so the color temperature for this test is from power levels that result in a GN of 2.8 or higher. Roughly half of the strobes in this test have a power level capable of a GN of 2.8 or less, and for most strobes this is only the last couple of clicks on the power dial. Color temperature can vary with power level output, so we tested power levels across the output range. Some strobes had a narrow range of color temperature variance, whereas others exhibited a rather large variance of over 1000 K in color temperature. A few hundred Kelvin of temperature variance is nothing to be concerned about, and we doubt anyone would ever see or care about the difference in actual real-life shooting conditions. Most strobes are warmest at maximum power and get progressively cooler as you turn the power down. Some strobes are cooler at maximum power, then get warmer when turned down, while some others start cooler, get warmer, then cooler as the power is turned down. This is why we list the temperature variance in the chart to see the warmest and coolest values tested. Since there is no industry standard on how color temperature is measured, we have no idea how strobe manufacturers are measuring their color temperature, and please don't take it that we are trying to call out any particular manufacturer's specification. We have not seen any manufacturer state a range for their color temperature specifications, making it difficult to make comparisons by using just 1 manufacturer stated color temperature versus another. By using the standard we defined above, along with the same testing equipment and conditions, we suggest comparing two strobes based on our test results rather than their manufacturer-published numbers to get a more apples-to-apples comparison. Color temperature had the most variance in the test results out of any measurement we performed. Each strobe was tested 3 times at each power level. Every strobe we tested had a different result each time. We took the median of those 3 results to come up with the numbers we used for the color temperature chart. The variance was sometimes upwards of 100-150 Kelvin and, in a few cases, more. This is a phenomenon we observed with testing strobes, which have extremely high-voltage capacitors that excite xenon gas inside a tube that generates a lot of light in a short period of time and a lot of heat. With so many variables, and the volatile nature of how much energy and heat is put out, it's not a surprise that strobes have a variance in color temperature that can't be nailed down to an exact, precise number. LED lights, like those in video lights, are much more stable in their color temperature. We tested LED video lights and found the light to be much more consistent in color temperature compared to a flash discharge tube. In a 30-second live test of color temperature, LEDs are showing around a 5 Kelvin difference in color temperature over that period of time. Because there are differences in the performance of color temperature from one shot to the next, and sometimes much greater variances with different power levels, it's almost impossible to narrow down a single exact color temperature number. Think of color temperature in broad ranges rather than pitting exact, imprecise numbers against each other when comparing two strobes. Also keep in mind that a diffuser will change the color temperature of the strobe as well, especially if it is a colored diffuser designed to change the color temperature of the strobe. If you have a good ole' standby favorite strobe that is getting long in the tooth but you like its color temperature performance, compare its color temperature from this test to others when looking for a replacement. This can give you a sense of what you may like rather than relying on a single manufacturer specification. Again, color temperatures are subjective. The ultimate choice is up to you as the photographer, depending on the look you want for your particular photo and shooting conditions. The moral of the story here is don't sweat color temperatures too much, it can vary, and look at a wider range rather than a single number. Use the test results to compare the relative difference between two strobes, rather than focusing on exact values. Back to TopPOWER LEVELSConsistency Of Power Levels In addition to testing the maximum output of the strobe, we also tested guide number at every power level. We are looking for consistency between different power levels. Power levels are usually specified in full or half stops by the manufacturer. GO BACK TO THE POWER LEVELS CHART Look for consistent spacing between power levels for a strobe. One or two tenths of a stop variation from what’s expected is not a concern, but more than a third of a stop variance leads to inconsistent power levels between power levels. Consistency is important for making nuanced lighting changes or for quick on-the-fly adjustments. A common pro technique to get a faster recycle time while the correct exposure is already dialed in is to increase the ISO and shutter speed by 1 stop and decrease flash power by 1 stop. Another example is dialing in a higher aperture for more depth of field and compensating flash exposure to account for the difference. The resulting flash exposures should be identical if the power levels on the strobe are consistent. Most strobes were fairly consistent in the power level adjustment, however, some were wildly off, so much so that multiple power level changes yielded hardly any difference. Back to TopWEIGHT Travel size and in-water weight are always concerns. If you want a higher guide number strobe with a wide, even beam and quick recycle time, it requires bigger batteries, bigger capacitors, bigger flash tubes, which all lead to a heavier weight. There is always a balance between power and weight. Macro centric strobes with a tighter beam pattern and less of a need for raw power due to the close up nature of macro work can be made much smaller and lighter than a big bang wide angle strobe. GO BACK TO THE WEIGHT CHART We measured the weight of every strobe with batteries installed in both air and in water with the same Intelligent Weighing Technology AHS-6 Hanging Scale that is accurate down to one ounce. Freshwater was used for in-water weights, as the difference in weight between fresh and saltwater is negligible for relatively small objects like strobes. Back to TopFLASH DURATION Flash duration is probably one of the more esoteric specs of a strobe, but is becoming more important to pay attention to as the flash sync speeds of cameras become faster. Flash duration is how long the flash tube is lit up when the strobe fires and can vary in length from hundredths to thousandths of a second. Flash duration is measured with a flash meter, and the time is expressed the same way as shutter speed. Slower flash duration limitations are most prominent in bright ambient light conditions. This is because using faster shutter speeds with a strobe that has a slower flash duration at the highest power level can result in the flash duration being longer than the shutter speed. In more temperate waters, we doubt many shooters would bump up against a flash duration limit due to the darker ambient light conditions and the likelihood of shooting a strobe at lower power levels. As the flash power is turned down, the duration gets faster, although that also comes with a lower output. GO BACK TO THE FLASH DURATION CHART Most current SLR and mirrorless cameras have max flash synchronization speeds of about 1/200 to 1/400 of a second. The flash sync speed is the fastest a shutter can fire with the entire sensor exposed. In order to get the full effect of a flash at full power, the flash duration needs to be faster than the shutter speed of the camera, or else the flash will appear diminished in the photo, since the shutter is faster than the duration of the flash. While the Ikelite DS230 has a flash duration of 1/107 second at full power, if it is turned down one click on the power dial, the duration shortens to 1/242 second, which will be faster than most cameras' flash sync speeds. Even after being turned down 1 click, the guide number is still one of the brightest round tube strobes in this article. Compact cameras don't have this issue as they have purely electronic shutters which capture every pixel at the same time, also known as a "global shutter". The shutter speed is not the limitation at this point, it is the duration of the flash. The Sony a9 III is the first full-frame mirrorless camera to have a global electronic shutter and is also not subject to flash sync speed, just like compact cameras. Expect this technology to trickle down into other mirrorless cameras in the near future, making flash duration a specification that should be paid attention to. The Sony a9 III can shoot without limitation on flash sync speed, but the limiting factor will be having a flash duration that is still faster than the selected shutter speed.Sony a9 III | Sony 90mm Lens | 1/2,500 | ISO 320 | ƒ8 Flashes also freeze motion. But if the flash duration is not fast enough, depending on how fast a subject is moving, motion blur can still occur. This can happen with fast-moving bait balls or pelagics, or when doing spin-type shots. If motion blur occurs from a long flash duration, use a lower flash power to speed up the duration of the flash. For spin-type motion blur shots, the flash should have a duration of around a minimum of 1/700 to 1/900 second, depending on how fast the camera is being jerked. Here's another very important tip, even for strobe settings that have flash durations faster than the sync speed of your camera. Make sure to set the camera to front curtain sync for the flash. This way, the flash duration will start at the beginning of the exposure and have time to complete before the rear curtain closes. If set to rear curtain, you could be cutting off the duration of the flash even if the flash duration is technically faster than the shutter speed being used. Back to TopCONCLUSION We hope this intensive testing article can shed some light (pardon the pun) on what to look for in a strobe and can help with direct comparisons between different models. At Backscatter, we pride ourselves on helping underwater shooters make an informed decision on what the best gear is for them. If you have questions at any time, give us a call or email us and we’ll be happy to help out. Back to TopAll Content Copyright Backscatter 2026. No data or images may be used or republished without direct written permission from Backscatter. WHY BUY FROM BACKSCATTER?Free lifetime tech support with every purchase. We will beat any advertised price. 20+ years of in-house warranty service and repair. Free shipping to USA and Canada and low-cost international shipping.Learn more!THE STR0BESAOIAOI UIS-P1 StrobeORDER NOWAOI Q1i StrobeORDER NOWAOI Q1 RC StrobeORDER NOWAOI Q1 TTL StrobeORDER NOWAOI Q1 StrobeORDER NOWBackscatterHybrid Flash Strobe & Video LightORDER NOWAtom Flash Strobe LightORDER NOWMini Flash 3 StrobeORDER NOWIkeliteIkelite RC232 Strobe with Modeling LightORDER NOWIkelite DS232 Strobe with Video LightORDER NOWIkelite RC165 StrobeORDER NOWIkelite DS165 StrobeORDER NOWIkelite RC Ecko StrobeORDER NOWIkelite DS Ecko StrobeORDER NOWInonInon S220 StrobeORDER NOWIsottaIsotta Red64 StrobeORDER NOWKrakenKraken Sports KR-S160 StrobeORDER NOWKraken Sports KR-S80 StrobeORDER NOWKraken Sports KR-S40 StrobeORDER NOWRetraRetra Flash Maxi StrobeORDER NOWRetra Flash Pro Max II StrobeORDER NOWSea & Sea Sea & SeaYS-D130R StrobeORDER NOW Sea & SeaYS-D3 Duo StrobeORDER NOW Sea & SeaYS-01 Solis StrobeORDER NOW Sea & SeaYS-03 Solis StrobeORDER NOWSeacamSeacam 160D StrobeORDER NOWSeacam 60D StrobeTesting Results Coming SoonORDER NOW
Related Posts
Backscatter Hybrid Flash Underwater Strobe & Video Light Review
With the introduction of the Backscatter Hybrid Flash HF-1, underwater photographers can now capture stunning stills and video with a single versatile tool. The Hybrid is the most powerful strobe and ...
Read More 
Sony a7R VI Underwater Camera Review
The Sony a7R VI is the latest generation of Sony's high-resolution full-frame mirrorless camera, and on paper, it looks like a relatively modest update to the already excellent Sony a7R V. The re...
Read More 
Sony 100mm Macro Lens Underwater Review
The Sony 100mm is the most exciting new macro lens for underwater imaging we have seen in years. Featuring high-quality, razor-sharp G Master series glass, enhanced autofocus performance, a native 1.4...
Read More 
The Best Underwater Strobes Tested 2026
It may or may not be a surprise, but there are no industry standards or governing bodies conforming the methods, or the specifications, on how underwater strobes are tested. Most strobe manufacturers ...
Read More 
Backscatter Hybrid Flash Underwater Optical Snoot Review
With the Optical Snoot OS-3, the super-bright, wide-angle beam of the Hybrid Flash is transformed into a precision lighting tool. From tiny macro critters to dramatic fish portraits, the Optical Snoot...
Read More 
Backscatter Atom Flash Sample Photo Gallery
The new Atom Flash and Optical Snoot OS-2 combo is an incredibly versatile underwater flash system, built from the ground up for the purist underwater photographer. Whether lighting massive underwater...
Read More