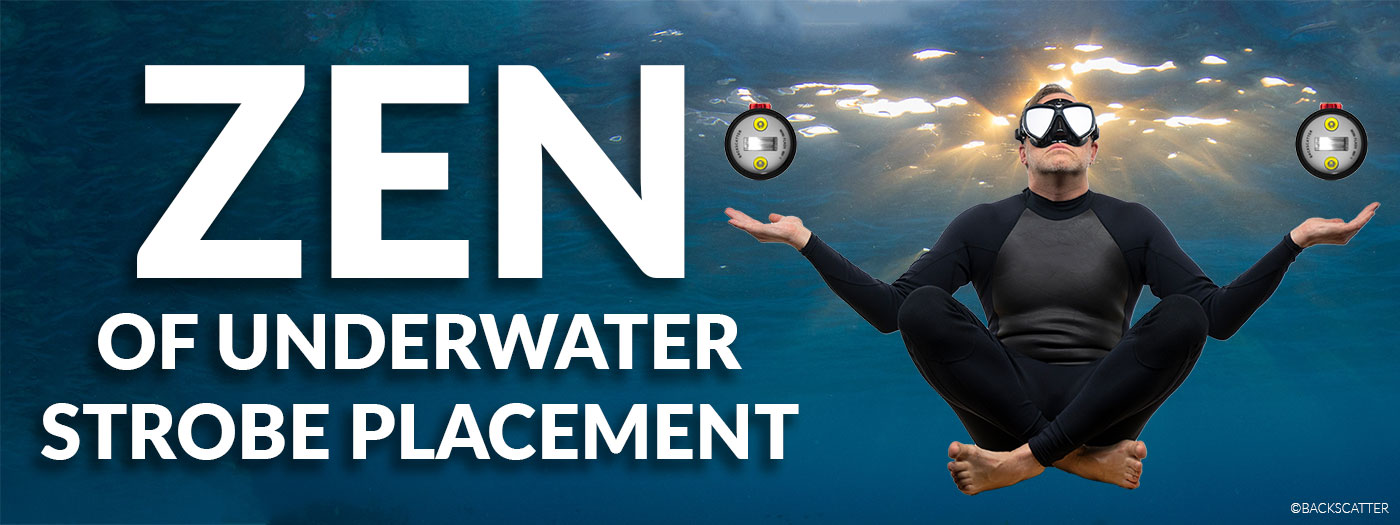
The Zen of Underwater Strobe Placement
WHERE THE %$#@! DO I PUT MY STROBES?By Jim DeckerWatch our video to get started on your path to becoming a strobe placement master. Over the years I have taught thousands of people how to shoot underwater. By far the number 1 question I am asked is “Where do I put my strobes?” as if there is one magic position to put their strobes. My simple Zen master answer to the student is always, “What do you want to light?” Aim the strobes at the thing you want to light! If you don’t know what you want to light, you will never know where to put your strobes. Which brings us to some fundamental truths about where to put your strobes: 1. Knowing where to put your strobes requires knowing what you want to light. 2. Knowing what to light means knowing what you want to have as a foreground subject. 3. Knowing what you want to have as a foreground subject means knowing what you want your composition to be. Which brings us to composition. Composition is not just about cutting Uncle Joe’s head off while he’s blowing out candles on a birthday cake. It is about where subjects are placed in the frame, how those subjects are lit, and where the focus point is set. For this article, we’ll concentrate on the strobe lighting aspect of composition, how to highlight subjects and draw attention to them, and of course where to put your strobes. An image should tell a story. In this image, the snake eel is the primary subject by being placed in the foreground and being lit by the strobe. The strobe only lights the subject and not the sand. The diver is a secondary subject that is purposely out of focus, in the background, and not lit by the strobe. The diver’s light looks like it is hitting the snake eel and the diver has “discovered” this critter in the sand. All of these elements were a conscious decision in the composition of this photo. Sony a7R III | Laowa Probe Lens | 1/80 | ISO 1000 | ƒ22A Few Guidelines for Lighting With Strobes As with anything, there are rules to follow when it comes to strobe lighting. Some rules are meant to be broken, but only after you understand why the rule exists in the first place. Here’s a list of guidelines on what to do with your strobes and why. Strobes Are for Foreground Subjects This might sound obvious, but I’ve seen plenty of people trying to light the entire ocean with a pair of strobes. It can’t be done, only the sun can do that. Strobes are to highlight and draw interest to a foreground subject and make it stand out from the surrounding elements and the background. Picking a foreground subject and deciding where it will be placed in the frame is the first decision photographers need to make before figuring out where to put their strobes. Get Close to the Subject You Want to Light We all remember from our basic scuba class that water filters out light quite effectively, in the order of the rainbow, ROY G BIV. This is why a photo shot from a long-distance underwater looks like it lacks contrast, color, and clarity. No amount of strobe power or camera setting can overcome this. This is why I use a fisheye lens for most of my wide angle photography. I can get close to the foreground subject while maintaining a wide field of view. The closer I am the more light from the strobes reaches the subject. Three feet is usually my maximum working distance to a subject, but in most shots, I’m probably within 6 inches to 2 feet. Keep the Strobes Behind the Handles for Wide Angle A fisheye lens is the most common lens to use when shooting wide angle because of the extremely wide field of view. This lets the photographer get super close to the subject and preserve as much clarity, contrast, and detail as possible. This also means that if the strobes are too far forward they will actually show up in the image. Sometimes you’ll see a glow in the upper corners of the image if the strobes are too far forward. Move the strobes back behind the handles to get them safely out of the frame. Get the Strobes Up Natural light comes from above. This is because the sun is above us, and the sun is natural. It is not natural for light to come from underneath something. This is why it is spooky to tell scary stories with a dive light under your chin. The shadows on the face, when lit from below, are odd and disturbing. The same thing is true for a fish face or a reef. I’ve never seen a great underwater picture with light coming from below, and I’ve never seen someone intentionally do it as part of a creative photo. So keep the strobes up above the centerline of the lens, and remember that if you switch to a vertical shot move the strobe that is dangling on the bottom up to avoid a spookily lit bad photo. Use a 2 Arm, 3 Clamp Arm System for the Most Flexibility Flexibility and holding strength are important with a strobe arm system. This is why I use a system that mimics my own arm. With 2 arm segments and 3 joints, I can place my strobe arm in any position, the same as my human arm. I prefer to use two 8 inch arms segments for each strobe. With this combo, I can get tight enough for macro and still have plenty of room to get out wide. Two 8 inch arms per side also provide plenty of room to add floats. The Further Away From the Subject, the Further Away the Strobes From the Lens With a large scene, the strobes need to be moved outward to fill the scene and avoid backscatter in the image. Conversely, when making a tight shot a few inches away from a subject, the strobes need to be moved in tight to the housing otherwise the strobes will completely miss the subject. A Note About Backscatter (The Blobs in Your Picture, Not the Store) Backscatter in an image is created by a strobe lighting up the particulate matter in the water when the strobe is firing in the same direction the lens is pointed. This directly lights up the particulate matter in front of the lens, causing those white, out-of-focus blobs to appear. If the strobe is repositioned so that it is not lighting in the same direction as the lens, the lens will be looking at a shadow (or unlit area of the water column) and not the lit part with the particulate matter. This will reduce the appearance of backscatter in the photo. Left image: The death star represents backscatter. When pointed in the same direction as the camera, the strobe will light up the particulate matter in the water and it will show up as backscatter in the image. Right image: By moving the strobe to the top and lighting down it is no longer firing in the same direction as the lens and the lens is now looking at mostly shadowed particulate matter which will greatly reduce the appearance of backscatter. This works well in scenes with a lot of sand near the bottom, but doesn’t work as well with scenes where there’s a lot of translucent blobs. A second method for reducing backscatter in an image is to not light it in the first place. This can be done by not lighting all of the water in front of the lens by just using the edge of the strobe light to the subject. This will leave a dark area in the water immediately in front of the lens and avoid lighting all of that scatter. This typically works well for larger scenes. The image on the left shows the light shining in the same direction that the lens is pointed. Anything in between the light spruce and the subject will be lit, including backscatter. The image on the right shows the light source being moved to the side so only the edge of the light beam hits the subject and doesn’t light the backscatter directly in front of the lens. This works well in scenes with both translucent blobs and/or sand where lighting from the top isn’t practical. Large scenes with low visibility make it really hard to avoid backscatter. Using these techniques can help minimize the appearance of backscatter, but won’t eliminate all of it. In low visibility conditions, consider sticking with close focus wide angle shots. Getting close to the subject will eliminate as much water as possible for the best color, contrast and clarity possible. It also reduces the amount of particulate matter as there is not as much water with particulate matter to shoot through. By changing the angle of the strobe, the area in front of the lens can remain dark and not light up the backscatter in the water. This is the best way to avoid backscatter in strobe positioning which is to not light it in the first place.So Just Tell Me Already Where Do I Put My %$#@! Strobes?!? “Where do I put my strobes?” We’ve established you can’t answer that question without first knowing what you want to light. Deciding what you want to light is part of composition. I have a series of example shots with strobes in positions that most people would consider “unconventional”. It’s only unconventional in the thought that the strobes are most times not in the standard 10 o’clock/2 o’clock position or the “car headlight” position by the handles. I move the strobe into a position so that it lights the object I want to light, and doesn’t light the things I don’t want to light. Nothing unconventional about that. There’s no better way to learn than learning by example in real life, so here are some shots to help illustrate and break down the strobe position. I’ve given them names that refer to something that everyone can relate to that I hope you’ll find useful to remember these positions. The Anglerfish This is a simple position that can be used for most macro shots and only requires 1 strobe. It kind of resembles an anglerfish dangling a lure. This will get light on the subject in a pleasing, natural manner. Move the strobe further out from the front port for things further away, and closer to the port for smaller critters. This is a great strobe position for beginners to get some good shots nailed down before moving on to more creative macro lighting. Nikon D850 | Nikon 105mm VR Lens | 1/250 | ISO 64 | ƒ32Nikon D850 | Nikon 60mm Lens | Saga Magic Tube | 1/250 | ISO 200 | ƒ20The Frankenstein This is great for subjects that might be on the limit of being too large for a macro lens, causing the photographer to be further away from the subject than is ideal for optimum contrast and clarity. By moving the strobes out to the front as far as possible, the distance from the strobes to the subject is shortened, with less water to shoot through. This will increase the contrast and clarity of the image as opposed to having the strobes pulled back by the housing handles. When angling the strobes down, it will create a shadow underneath the subject and is a great technique for separating a subject from the bottom, and to help bring your photo back from the dead. Sony RX100 V | 1/200 | ISO 80 | ƒ11Sony RX100 VII | 1/2000 | ISO 320 | ƒ11The Ape Hanger For wide angle, this is my “easy rider” go-to position when photographing something sitting on the bottom, especially in highly reflective sand. The idea is to get the strobes up and as far away from the sand as possible, then angle the strobes straight down and let the light hit the subject on top of the sand first. The light will have to travel further through the water to reach the sand versus the subject, and this amount of additional distance is just enough to prevent a blown-out exposure on the sand, but still maintain a good exposure on the subject. It also has a side effect of reducing backscatter in a photo by lighting the scatter from the top, rather than head-on, so that the lens is mostly looking at shadow rather than a brightly lit particle. Nikon D500 | Nikon 8-15mm Lens | 1/125 | ISO 200 | ƒ8Sony a6400 | Tokina 10-17mm Lens | 1/160 | ISO 400 | ƒ16Bark At The Moon For those Ozzy Osbourne fans out there we have the Bark At The Moon, which in addition to being a great album, also shows one of my most used strobe positions for vertical (portrait) shots on the album cover. Remember for vertical shots to get the strobe that would otherwise be dangling below the lens up above the centerline of the lens to avoid ghoulish shadows. In this position, one strobe will most likely be closer to a subject than the other. The closer one will need to be moved closer to the camera and the power level turned down while the one further from the subject will need to be moved further away and the power level turned up. Nikon D500 | Tokina 10-17 mm Lens | 1/160 | ISO 100 | ƒ11Canon 5D IV | Canon 8-15mm Lens | 1/125 | ISO 200 | ƒ82112 If you’re a Rush fan you’ll immediately get this reference to Starman on the gatefold of the 2112 album. For the 99.9% of the rest of you, it’s basically a horizontal (landscape) version of the Bark At The Moon with one strobe over the center of the housing and one strobe off to the side. This is used for subjects where one side of the subject might be closer to the lens than the other. Similar to the Bark At The Moon, the 2112 will have the closer strobe in tighter to the housing, usually the one in the center, with the power turned down, and the one on the side usually positioned further away with the power level turned up to compensate for the longer distance to subject. Always remember to keep the strobes up or the solar federation will assume control! Nikon D850 | Nikon 8-15mm Lens | 1/100 sec | ISO 64 | ƒ8Olympus OM-D E-M5 II | Panasonic 8mm Lens | 1/250 sec | ISO 320 | ƒ10Princess Leia Used for close focus wide angle shots where the strobes need to get in as tight as those iconic hair buns. When subjects are only inches away from the dome port, mash those strobes in super close to the housing to make sure you get light on the subject. This position is one where you have to be keenly aware to keep the strobes behind the handles to avoid showing up in the image (where not even the mysterious ways of the dark side of the force can save the shot). Nikon D500 | Tokina 10-17 mm Lens | 1/160 sec | ISO 200 | ƒ8Canon 5D IV | Canon 8-15mm Lens | 1/200 sec | ISO 160 | ƒ22Titanic This strobe position is best used for subjects that are huge, like the Titanic. Kate Winslet shows the perfect strobe position on the bow of the ship. Get those strobes straight out as wide as possible to cover super large subjects like shipwrecks. This position is used for the largest objects that will ever be lit by strobes, so the power is usually set at or near full power to get enough light on the subject. As with the Princess Leia, make sure to keep the strobes up above the centerline of the lens and behind the handles to avoid having the strobes in the shot and sinking your picture. Nikon D500 | Tokina 10-17 mm Lens | 1/160 sec | ISO 250 | ƒ8Nikon D850 | Nikon 8-15mm Lens | 1/250 sec | ISO 200 | ƒ8Conclusion You’ll never know where to put your strobes if you don’t know what you want to light. Composition and knowing what you want to light is the first step in strobe placement. I hope these strobe positions will help you get out there and think about picking and lighting a foreground subject. If you’re ever in a lurch on what strobe position to use, remember the simplicity of point it at the thing you want to light. You are now ready for the world, grasshopper. Download the Quick Guide Find your Zen any time with the Zen of Strobe Placement Quick Guide. Keep this reference sheet in your camera bag and consult it whenever you need a quick reminder about where to place your strobes. Why buy direct from Backscatter?Free lifetime tech support with every purchase. We will beat any advertised price. Free shipping to USA and Canada and low-cost international shipping.
Related Posts
Best Underwater Action Camera Settings Guide
What kind of action camera diver are you? Do you capture clips here and there on your dive, spend your entire time underwater shooting video, or use an action camera alongside a larger, dedicated came...
Read More 
Backscatter AOI QRS Quick Release Lens System Installation Guide
The AOI Quick Release System (QRS) offers a convenient way to store and swap lenses for AOI and Backscatter lenses. When used with the Backscatter Double Handle and Tray and The Arch, the system posit...
Read More 
Complete Guide For GoPro HERO13 Best Underwater Video & Photo Settings
The GoPro HERO 13 Black is the best camera from GoPro to date and is our favorite action camera. The GoPro HERO13 has upgraded battery life for longer shoots, super smooth image stabilization, and a s...
Read More 
Interviews with the Pros: Shooting Subjects Big and Small with Dustin Adamson
From humpback whales to nudibranchs, tiger sharks to flamboyant cuttlefish, Dustin Adamson has shot it all. In this interview, Dustin shares key insights on the gear he uses, as well as his process an...
Read More 
Remote Lighting with Backscatter Hybrid Flash, Atom Flash, Mini Flash 3, & Mini Flash 2 Underwater Guide
One of the standout features of the Hybrid Flash and Mini Flash 2 is Remote Mode. Unlike a simple slave mode, Remote Mode allows for remote triggering and adjustment of power levels on an off-camera H...
Read More 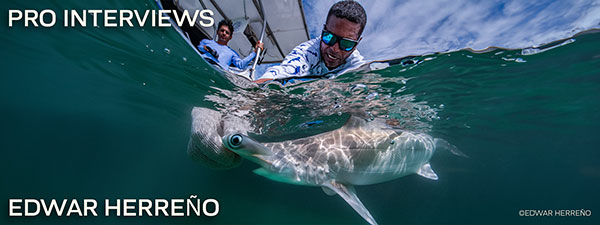
Documenting Marine Conservation with Edwar Herreño
Backscatter pro client and affiliate Edwar Herreno is a marine biologist, technical diving instructor, conservationist, and award-winning freelance underwater photographer and filmmaker. His work has ...
Read More