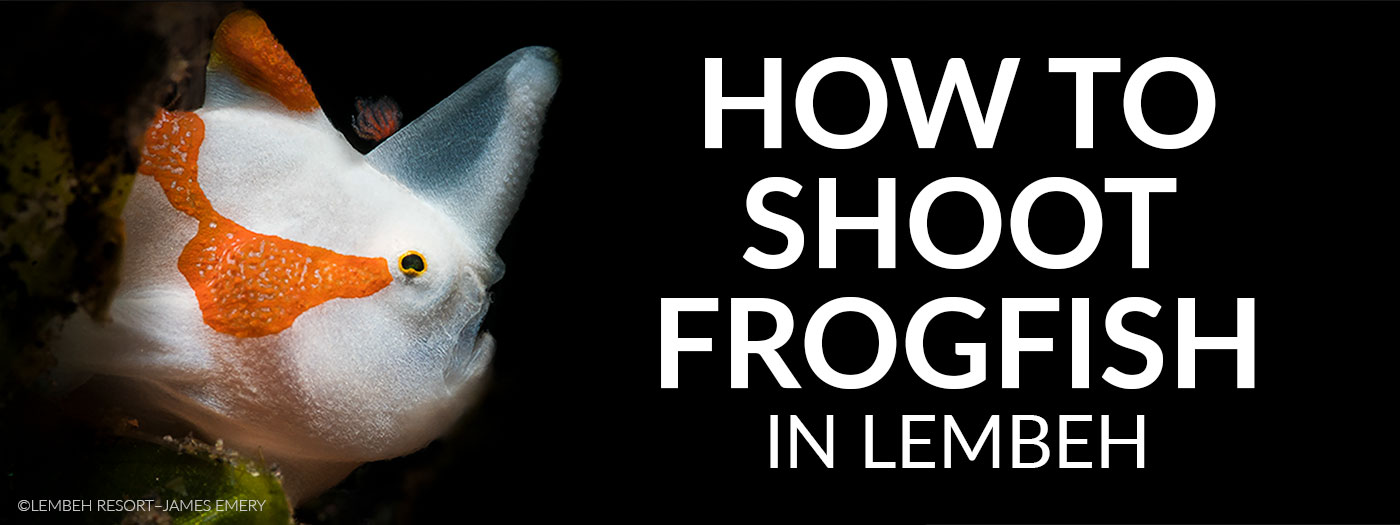
Frogfish Underwater Photo Tips For Lembeh
by James EmeryTIPS FROM OUR BACKSCATTER AUTHORIZED PHOTO CENTER LEMBEH RESORT, INDONESIA My name is James Emery and I am the Backscatter Authorized Photo Pro working at Lembeh Resort in Indonesia. Lembeh Resort is a luxurious boutique resort situated in a private cove on Lembeh Island. Within the resort you will find the Authorized Backscatter Photo Center where our Backscatter trained staff will greet you with any photo or video inquiries you might have. Inside the photo center you will find a fully stocked photography shop where myself or one of my photo assistants can help you find the perfect camera setup for your underwater adventures here at Lembeh. Our photo equipment and accessories are not only available for rent, but also to purchase. We offer customized photography and underwater video courses along with personal coaching to help you improve your techniques and capture images that accurately depict the incredible beauty that awaits you underwater here in North Sulawesi. Backscatter Authorized Photo Center at Lembeh Resort in Indonesia The Lembeh Strait is world-famous and often referred to as the Muck diving capital of the world” or the “Mecca of Muck”. Once you experience Lembeh underwater, there is no question of how it got its reputation. Lembeh attracts recreational divers, marine biologists, and photographers from all over the globe to experience the rich marine biodiversity which includes some rare and wonderful critters unique to Lembeh. One of the most sought-after subjects to capture here in Lembeh is the frogfish. You can find 9 different species of frogfish here in Lembeh from the iconic Hairy frogfish to Painted, Giant, Warty/ Clown, Scarlet, Ocellated, Randall’s, Sargassum, and Hispid. frogfish are known to have a face only a mother could love, but ironically, they make for one of the best models for underwater photographers since they hardly move and have incredibly unique and defining features. These are my favorite tips for capturing classic shots of these weird creatures. Hire A Private Guide And Let Them Do The Hard Work The hunt is certainly part of the fun when it comes to muck diving but sometimes comparing your dive with others you may find yourself coming up short in your hunt. It takes a trained eye and some background knowledge to find some of the immaculately camouflaged critters. Some would say the guides abilities to find critters is a “superpower” but behind the scenes, there is thorough training on understanding the habitats, diets, and behaviors of the critters so that the guides can make the most out of your bottom time. Once you witness a Painted frogfish hunting or a Hairy frogfish yawning, you will not want to leave that subject without getting the shot you have been envisioning for so long. Even worse, have you ever been busy taking a photo and looking up to realize your group or buddy has left you? This is where diving in a group as a photographer can be very limiting. First, I recommend hiring a private dive guide if you want to utilize your time, patience, and focus to accomplish that shot you have been dreaming of. Most of the private dive guides in Indonesia are accustomed to guiding photographers. As the manager of the Authorized Backscatter Photo Center, I train all the dive guides to have intensive background knowledge on how to help divers achieve their photographic visions underwater. Beneath the surface, you can expect your guide to find unique critters in photogenic positions, help with your strobe positioning, or even hold your snoot and additional accessories you may have. To guarantee a better success rate with your underwater shots, it is always best to talk to your dive guide before you get in the water and discuss with them your vision and what type of photograph you are trying to achieve. Hiring a private dive guide is invaluable in Lembeh, they have been trained to help make your dives photo productive.Sony a7R III | Canon 8-15mm | 1/200 | ISO 200 | ƒ11Have A Vision On What You Want The End Product To Look Like Frogfish are great subjects because they typically do not move much. This allows a photographer to work with different angles and lighting techniques while using the same subject. With just the wrong lighting, it is quite easy to make a frogfish look merely like a blob with eyes. So, before jumping in the water, envision what type of photo you would like to capture. Ask yourself if you want to capture a portrait or demonstrate behavior. Do you want to simply take a photo to show the frogfish as a whole or use dramatic lighting to highlight small details? These are important questions to ask before a dive to eliminate any frustrations or wasted time underwater. If you do not know where to start, turn to some of your favorite photographers’ galleries for inspiration. Small Aperture And Fast Shutter Speed For Focused, Colorful Images Depth of field (how much of our image is in acceptable focus) is one of the biggest concerns when it comes to macro photography. There are three factors that affect depth of field: Aperture, Focal Length, and Distance to Subject. With Aperture, the smaller the ‘f’ number, the less depth of field (DOF) we have. The longer the focal length will also result in less DOF. And the less distance between the lens and the subject, the less DOF there is. Typically in macro photography, we are very close to our subject and using lenses such as 60mm, 90mm, 100mm, 105mm, or for compact cameras the zoom function. This means our DOF is small to begin with. To compensate for the paper-thin DOF, we can decrease the aperture (choose a bigger ƒ-number) which will then expand the DOF. For example, this will make it much easier to focus on that frogfish’s eye. For compact shooters first starting on macro photography, I highly recommend using your highest ƒ-number, usually, that will be ƒ8-ƒ11. On the Olympus TG series, the highest will be ƒ18. For Micro 4/3 use ƒ16 and DSLR and full-frame Mirrorless use ƒ22. The next step is to make sure we cut out all ambient light to get the best color reproduction of the frogfish. Shutter speed controls ambient light underwater; the faster the shutter speed, the less ambient light that will be recorded. With compact cameras, I recommend using 1/250 but you can change this to a faster speed 1/500 – 1/1000 if you wish to have a darker background. DLSR and Mirrorless cameras will be limited to their fastest sync speed when using strobes, which is usually 1/250. This also helps to get rid of a distracting background and achieving a black background. Use Two Strobes For Dynamic Lighting When talking ‘Frogfish’ we do not want to resort to the standard 2-10 o’clock strobe positioning to evenly light the entire frame. Usually, frogfish are found camouflaged on the substrate with a distracting background that we do not want to expose. To make a more dynamic photograph we can use our strobes in the 2-10 o’clock position, but with a different output power for each strobe. This technique individualizes your strobes into a ‘Key Light’ and a ‘Fill Light’. The Key Light will be the brightest light and will illuminate your subject and the Fill Light is used to fill in shadowed details. The greater difference in power between the strobes will create a more dramatic effect. With this technique, we can choose what we want to illuminate which helps frogfish stand out from a messy background. With two strobes on the same power you will illuminate the whole scene. Turning down the left strobe a couple of stops will create shadows for a more dynamic shot.Sony a6500 | Sony 90mm | 1/160 | ISO 100 | ƒ22 This technique works best when shooting the frogfish at a slight angle. By choosing the best position with fewer elements behind the frogfish will help separate the frogfish from its background. Once you have chosen your angle, you want to designate the strobe that the frogfish is facing as your Fill Light by turning down the strobe power by 1-2 stops. The other strobe will be the Key Light which will illuminate the frogfish’s body and create a drop shadow behind the subject. This way the background will not be illuminated and will render black. It will also create light fall on the front of the face and shadows on the body for a more textured and dynamic photo. Tip: Switching the Key and Fill lights to the opposite side is a great technique to use with Hairy Frogfish as this will highlight the hair against their body. Sony a7R III | Sony 90mm | 1/250 | ISO 200 | ƒ14Use One Strobe For Dramatic Lighting Don’t be mistaken that you can’t master a great macro photo with only one strobe. One strobe is quite powerful and can achieve dramatic photos. Similar to the two-strobe technique of designating one as the Key light and one as the Fill light, we are simply designating your only strobe as the Key light and eliminating the Fill light completely. To achieve this effect, position your strobe either at the 2 o’clock or 10 o’clock position, depending on the direction the frogfish is facing. This will create a dark, dramatic drop shadow behind the frogfish which not only enhances its moody persona but also eliminates any distracting background. Placing one strobe to the side will cast very strong shadows, which works great to create dramaSony a7R III | Sony 90mm | 1/250 | ISO 100 | ƒ22 Another great position for a single strobe is to have the strobe at the standard 12 o’clock position, but face the strobe directly downward at your camera housing. In order to decrease backscatter, slightly move your strobe back towards you, this way, only the edge of the strobe’s beam will touch your subject and will not illuminate the background. Use A Snoot For Creative Lighting Using a snoot is a great tool to highlight key features of a subject. Underwater strobes usually have a very wide beam angle which is not always desirable for macro photography. With a snoot, we can choose the diameter and shape of the light source. Snoots can be slightly intimidating to use at first. I find the Backscatter Mini Flash MF-1 and Optical Snoot OS-1 reduces the learning curve when using a snoot for your first time. For pros who want the best light quality, these snoots eliminate many complications that come with other snoot equipment. Using a snoot is a great way to get creative with your lighting without the worry of illuminating too much backscatter. There is no right or wrong position to place your snoot and you can get some unique results when placing it in various positions. Here are some examples of some of my favored snoot positions when shooting frogfish: Top-Down/Spotlight For this position, we position the snoot directly above the subject. This will create a spotlight over the frogfish, producing natural shadows below the subject, but also illuminating the substrate. This can be good if you wish to show the subject’s environment, but with frogfish and their nature to camouflage, this technique can potentially highlight distracting elements in the frame. Placing the snoot directly above the subject to create a spotlight effect.Sony a7R III | Sony 90mm | Backscatter Mini Flash 1 Combo with Snoot | 1/250 | ISO 100 | ƒ18The 45° Portrait In this position, we aim the snoot at a 45-degree angle pointing at the subject. The idea is to only illuminate the subject and nothing else. For frogfish, this is a great option to highlight the details of their face creating a unique portrait. Using the oval-shaped aperture cards with the Backscatter Mini Flash 1 Combo with Snoot really helps shape the light on the frogfish’s face. Angling the snoot to illuminate only the face creates a great portrait Sony a7R III | Sony 90mm | Backscatter Mini Flash 1 Combo with Snoot | 1/250 | ISO 100 | ƒ22Side Lighting For this position, we want the snoot facing the frogfish from the side but at a 90-degree angle from your housing. This works best with a side profile of the frogfish and the snoot pointing directly at its head. This casts shadows in an unconventional way but makes for a very dynamic and textured photograph. You can even go a step further than this and combine it with backlighting. Placing the snoot directly pointing at the subject whilst in a side profile creates texture and shadowsSony a7R III | Sony 90mm | Backscatter Mini Flash 1 Combo with Snoot | 1/250 | ISO 200 | ƒ22Mix It Up, Try Different Techniques One of the best things about diving the muck in Lembeh is there are always subjects to shoot. Having a sandy substrate also makes it easier to focus on photographic techniques and do it all in an ethical way without disturbing the environment. Another great aspect of diving in Lembeh is that the dive sites are easy to get to and the critters rarely move far overnight. If you speak to your dive guide you can usually revisit the same subjects the following day. This is great if you get back from a dive, upload your photos to your laptop and discover that you did not quite get that frogfish’s eye in focus, or that your strobes were creating a little too much backscatter. Once you master your macro settings, try experimenting. With incredible macro subjects available day-to-day, you can produce different photos of the same subjects to really push your creative boundaries. Some Experimental Advice:Open up the aperture for bright colorful backgrounds This works great with black or darker frogfish. Opening up the aperture to ƒ5.6 or even ƒ2.8 will allow more light through the lens which will expose the frogfish’s body. A bigger aperture will also produce a lighter background. Remember, when shooting with bigger apertures, you will have to turn your strobe power down to compensate for the exposure. Try experimenting with your aperture setting to accomplish a nice, blue background. Opening the aperture allows for darker subjects to be illuminated or to create a blue backgroundSony a7R III | Sony 90mm | 1/250 | ISO 100 | ƒ2.8Use A Different Lens For A Different Perspective Most of the time during macro photography we will be using a 60mm or a 100mm macro lens. However, larger species such as the Giant Frogfish or the Hairy Frogfish can look great while shooting with close focus wide angle (CFWA). For this to work, you will need a fisheye lens like the Canon 8-15mm that has a very small minimal focus distance. You will also need a mini-dome so you are able to get nice and close to your subject. With the mini-dome, you can bring your strobes in tighter to the housing so you can expose the subject correctly. Using a fisheye lens and a mini dome is a great way to show the frogfishes environmentSony a7R III | Canon 8-15mm | Zen mini dome | 1/60 | ISO 400 | ƒ16Try An Artificial Background For An Artistic Look Frogfish are usually found camouflaged among a messy background as we have discussed. We can take an artistic approach by using a customized background on a slate to add some flair to a simple underwater scene. There are many different ways you can achieve this effect, but through trial and error, my go-to techniques are: painting glitter on a dive slate, using laminated holographic paper, or use a wire sponge with a colored video light aimed on it. Using laminated holographic paper on a dive slate to create colourful bokeh for an artistic background.Sony a7R III | Sony 90mm | Backscatter Mini Flash 1 Combo with Snoot | Kraken Hydra 2500 | 1/15 | ISO 100 | ƒ4Combine Techniques And Accessories To Get Creative A slow shutter snooted pan creates a photo that stands out in a portfolio. The technique is to snoot the frogfish as normal, but with a slow shutter speed of 1/15 – 1/5. When you press the shutter, pan the camera left or right. The frogfish will be sharp from the exposure of the snoot and the rest will render with motion blur. Snooting whilst using a slow shutter emphasizes motion blurSony a7R III | Sony 90mm | Backscatter Mini Flash 1 Combo with Snoot | Kraken Hydra 2500 | 1/8 | ISO 100 | ƒ22Conclusion The Lembeh Strait is a dream destination for all the weird and wonderful critters. With 9 different species of frogfish, you are spoiled for choice. Be sure to hire a private guide so you can achieve your vision of the perfect shot of a frogfish. Think about those photos you have researched and remember which ones stood out to you. Use the Key Light and Fill Light to create a more dynamic photo or just use one strobe for a more dramatic look. Use a snoot to take full control over your exposure and eliminate that distracting background. Don’t be afraid to mix it up and experiment, diving in the muck allows you the opportunity to test a variety of techniques. Most importantly: enjoy your encounters with our frowny friends the frogfish About The Author The UK born, James has been working in the field of underwater imaging since 2011 when he began shooting underwater videos in Koh Tao, Thailand. Since then, James has been actively shooting underwater images and videos in Thailand, the Philippines, and the Maldives before joining Lembeh Resort as the Photo Pro in 2019. Prior to entering the world of underwater imaging, James studied video production at Bournemouth University, and, having grown up close to the ocean and diving since he was 12 years old, James decided to combine his production skills with his passion for diving and moved to South East Asia. James’s images have featured in numerous publications including Dive Magazine UK, Wetpixel, UWP Mag, and TDI training manuals. Want To Dive With James? Contact Our Travel Company Under Exposures & Book A Trip!BOOK A TRIP
Related Posts
Best Underwater Action Camera Settings Guide
What kind of action camera diver are you? Do you capture clips here and there on your dive, spend your entire time underwater shooting video, or use an action camera alongside a larger, dedicated came...
Read More 
Backscatter AOI QRS Quick Release Lens System Installation Guide
The AOI Quick Release System (QRS) offers a convenient way to store and swap lenses for AOI and Backscatter lenses. When used with the Backscatter Double Handle and Tray and The Arch, the system posit...
Read More 
Complete Guide For GoPro HERO13 Best Underwater Video & Photo Settings
The GoPro HERO 13 Black is the best camera from GoPro to date and is our favorite action camera. The GoPro HERO13 has upgraded battery life for longer shoots, super smooth image stabilization, and a s...
Read More 
Interviews with the Pros: Shooting Subjects Big and Small with Dustin Adamson
From humpback whales to nudibranchs, tiger sharks to flamboyant cuttlefish, Dustin Adamson has shot it all. In this interview, Dustin shares key insights on the gear he uses, as well as his process an...
Read More 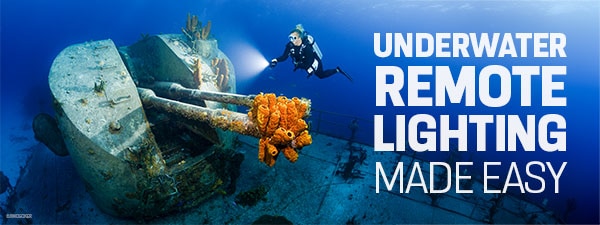
Remote Lighting with Backscatter Hybrid Flash, Atom Flash, Mini Flash 3, & Mini Flash 2 Underwater Guide
One of the standout features of the Hybrid Flash and Mini Flash 2 is Remote Mode. Unlike a simple slave mode, Remote Mode allows for remote triggering and adjustment of power levels on an off-camera H...
Read More 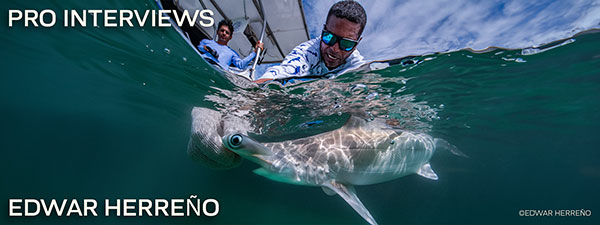
Documenting Marine Conservation with Edwar Herreño
Backscatter pro client and affiliate Edwar Herreno is a marine biologist, technical diving instructor, conservationist, and award-winning freelance underwater photographer and filmmaker. His work has ...
Read More