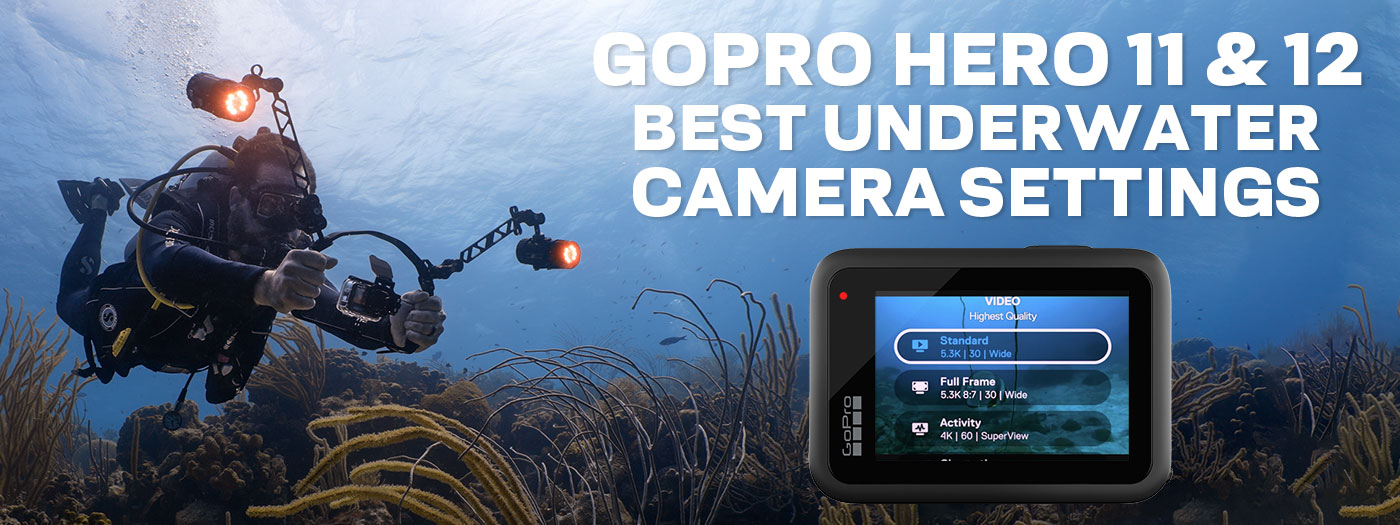
Complete Guide for GoPro HERO 11 & 12 Best Underwater Video & Photo Settings
The GoPro HERO 12 and GoPro HERO 11 are our favorite action cameras yet because of the impressive built-in video stabilization, how easy it makes it to start capturing great looking 4K Ultra High Definition video clips underwater, and how compact and well suited for travel it is. It can also snap photos with point-and-shoot simplicity. This guide will walk underwater photographers and video shooters through everything they need to know in order to equip, set up, and use their GoPro HERO12 successfully while diving, snorkeling, and freediving. Most settings will be set-and-forget so that the only thing we need to change during our dive is our Custom Preset shooting mode for wide angle video, macro video, or photos. Be sure to download a copy of the Cheat Sheet PDF with all of these settings so that you can always have it with you. We recommend laminating a copy and keeping it in your camera bag. Watch our complete setup guide video for even more context, pro tips, and advice.Download a copy of these settings to save and share. DOWNLOAD HEREESSENTIAL UNDERWATER ACCESSORIESGet set for success with the essential underwater accessories Here are all the essential accessories and underwater equipment that we recommend for the GoPro HERO12, as well as information about when and how to use them. GoPro HERO12 Black One of the most popular action cameras on the market, the GoPro HERO12 is a great way to start capturing 4K 60p video and beyond. GoPro Protective Dive Housing Keeps the camera safe down to 200ft/61m and required for FLIP Filter system to be installed. FLIP11 Filters & +15 MacroMate Mini Lens Interchangeable, modular filter and lens system that overcomes the 2 biggest challenges that the GoPro faces underwater: wide angle color correction and macro focus. Wide Angle Requires a Filter Cameras need to be able to set a manual white balance to restore the red, orange, and yellow color tones that would otherwise be lost as we descend deeper into the blue, green, and cyan-toned water. By adding a color correction filter onto the GoPro HERO12 we are able to restore the red, orange, and yellow color tones without having to change any settings in the camera. We recommend FLIP Filters for GoPro because they offer easily interchangeable filters for different levels of color correction at different depths. GoPro cameras need a filter to restore warm color tones at depth.Macro Requires a Lens The lens of the GoPro HERO12 is a fixed-focus lens, so getting too close (less than 12” away) to subjects will result in soft focus which is unacceptable for close-up work. This limitation can be overcome by using our +10 Close-Up Lens and +15 MACROMATE MINI Lens, both of which move the fixed focus range of the camera closer, allowing you to get closer to smaller subjects without dropping focus. By adding accessory lenses the focus range of the camera can be moved closer, allowing for sharp shots of smaller macro subjects.Backscatter Double Handle Tray and Arch A tray with dual handles provides more stability than a single handle or selfie stick. The Double Handle and Tray is the basis for which all other accessories are attached. This particular tray easily accommodates multiple styles of control arm mounts, tripods, and safety lanyards, while The Arch adds an additional handle, enables a vertical grip position, and more connection points for lights or other accessories. Control Arms: Ball or Flex Control arms come in two primary styles, Ball and Flex. Flex arms are less expensive and easy to maneuver into place, but they cannot have buoyancy compensation added to them and they aren’t as stable or precise as Ball arms. Ball arms offer the ability to add buoyancy compensation to offset their weight and offer much more finely tuned precise and stable control over lighting placement. Ball arms are what we recommend most. Backscatter Macro Wide 4300 Video Light GoPro cameras need a lot of light underwater and a video light is the best way to add more into the scene. The Backscatter Macro Wide 4300 is more than bright enough to allow the GoPro to produce great-looking results even when shooting deep or in the dark. It also has wide angle, macro, and red beam modes built-in for maximum versatility. We recommend using 2 lights when shooting wide angle to completely fill and evenly light the scene. Only 1 light is required for macro, with the option of adding on the Optical Snoot OS-1 to highlight the subject and darken the background. Learn more about the Backscatter Macro Wide 4300 Video Light with our review here.Tripod Nobody likes watching shaky footage. An adaptable, flexible tripod is essential for solid, stable video when shooting macro clips. The shots are so tight that any handheld shake can instantly drop their quality or usefulness. GETTING STARTEDPower On & Setup The first thing to do upon powering up the GoPro is to set your desired language, agree to the terms and conditions of use, and choose whether to activate the GPS or not. Set the GPS to ‘off’ because it doesn’t work at depth underwater. The GoPro will then prompt you to install the GoPro Quik app on your smartphone. The Quik app is required to finish the setup on the camera. The GoPro will need to pair with the phone and download the latest firmware before it can be used. PRO TIP: Make sure to take care of this step before you depart on your trip and arrive somewhere with limited data or internet access! The Quik app will allow you to enter a custom name for your camera and will also enable remote operation and live preview on your phone, but these are only practical above water. Dashboard Settings While at the main shooting screen, swipe down to bring up the Dashboard. The Dashboard displays 7 settings icons, the time, date, and other information at the top of the screen. The icons may be tapped to toggle them on or off or bring up additional options within them. The icons will be blue when on or gray when off. Set the Dashboard icons as follows: The DashboardVoice Control: OffBeep: OffQuikCapture: OnScreen Lock: OffFront Screen Options: Status OnlyOrientation: LockedMax Lens Mod: OffYour Dashboard icons should look exactly like this when set correctly. The Dashboard settings are set-and-forget, They remain unchanged regardless of shooting mode and will not need to be adjusted no matter how we use the camera. Video Mode & Controls Settings Swipe right from the Dashboard to bring up the Video Mode, Controls, and Preferences page. Tap the Video Mode box and make sure that it is set to ‘Highest Quality’. This guarantees that you have access to all of the different video resolutions and frame options that the camera has. Tap the Controls box and change that from ‘Easy’ to ‘Pro’. The default ‘Easy’ control scheme is meant to simplify the interface for new shooters, but it restricts us from accessing the essential settings that we need to change for underwater use. Video Mode: Highest QualityControls: ProSet the Video Mode and Controls accordingly to have full access to the camera settings.Preferences MenuGeneral Settings Next, select Preferences to bring up the menu within. Then select ‘General’. Set these as follows: General Settings:Beep Volume: HighQuikCapture: OnDefault Preset: Last UsedAuto Power Off: Never / 5 MinLEDs: All OnAnti Flicker: 60HzPRO TIP: Anti Flicker - PAL vs NTSC 60hz is the North American standard for NTSC. If you’re in a country running the PAL standard you’ll want to select 50hz. This will also cause the frame rate settings to be slightly different. After confirming the ‘General’ settings, go back one page to the Preferences menu, then scroll down to ‘Displays’. Set these as follows: Display Settings:Orientation: LandscapeScreen Saver Rear: NeverScreen Saver Front: Match Rear ScreenDisplay Brightness: 100%Rear Screen Grid: OffReset/Format Memory Card After confirming the ‘Display’ settings, go back one more time to the Preferences menu, and scroll down to ‘Reset’. This will give you the option to Format the memory card, which we want to do in order to wipe it clean and start with an empty card for the start of our shooting session. Make sure to back up the memory card first as formatting it will completely erase any media stored on the card. Battery Conservation Tips & Settings Maximizing battery life will ensure that the camera makes it through an entire dive. We like to save battery life by minimizing the time the camera is on, but we also want the camera to be ready to record in a split second. We use a combination of screen and power settings as listed above to pull this off. First, set Auto Power Off to ‘Never’ if you're actively monitoring the camera, or ‘5 Min’ if you tend to get distracted and forget to manually turn off the camera between scenes. Next, set QuikCapture to “On” and Default Preset to “Last Used.” No matter if you’ve manually turned off the camera or if it times out in 5 minutes, QuikCapture will allow you to instantly turn on the camera and begin recording with just one press of the record button. While it might be tempting to activate the Screen Saver to reduce power, this will cause the screen to go black during recording so we keep it set to ‘never’. The screen brightness is dimmable to conserve power, but shooting in bright shallow conditions will require a bright screen to overcome any glare so we keep it set to 100% during daytime use. Lower brightness levels of 60-75% however can be effective on night dives to increase battery life. After completing all of the above settings, back out of the menu and return to the main shooting screen. CUSTOM PRESETSThe Secret Menu & Custom Presets When the camera is sealed in the GoPro Protective Housing there is no access to the touchscreen. This effectively locks the user out of all settings choices other than choosing between video, photo, and time-lapse modes by using the Mode button. We need to use 2 methods to overcome this challenge: Custom Presets and what we call the “Secret Menu”. Activate the Secret Menu by first holding down the Mode button and then pressing the Record button - don’t press them simultaneously, hold Mode THEN press Record. If activated successfully the camera will display the default included presets on the rear screen. You can then use the Mode button to cycle between them and use the Record button to select one. This is how to select your desired shooting mode without access to the touchscreen. Press the Record button while holding the Mode button to activate the Secret Menu The standard default presets will not achieve our imaging goals underwater, so you must create Custom Presets with our ideal settings instead. Once created you can select the Custom Presets from within the Secret Menu in this same method. With different Custom Presets for each shooting mode, you will be able to use the Secret Menu to simply swap between wide angle, macro, slow-motion, and any other modes while the camera is sealed in the GoPro Protective Housing. By cycling through user-created Custom Presets you can cycle between shooting modes while the camera is sealed in the GoPro Protective Housing without touchscreen access.Creating Custom Presets Creating new Custom Presets is very easy to do. While at the main shooting screen, tap the settings box in the bottom middle of the screen, or activate the Secret Menu. Next, tap the Edit icon (that we affectionately call the “Hamburger” icon) in the upper right-hand corner of the screen. This will turn the icon to a “+”, tap that to create a new Custom preset. Mode The first thing to select is the mode. Only Video options are available while the camera is in Video mode, whereas Photo options will become available once we switch to Photo mode (using the button on the side of the camera) and build new Presets for photos within that mode. Press the check icon in the top right corner to confirm your selection. Aspect Ratio, Resolution & Frame Rate The next options are aspect ratio, resolution, and frame rate. These are the three most overall important settings because they determine how much information the camera will capture while recording. Aspect ratio, resolution, and frame rate are the most important video settings. The aspect ratio determines the “shape” of your video or photos, or the portion of the sensor that is used to record them. Traditional video such as on your home TV will be 16:9, while traditional photos will be 4:3. Resolution determines how many pixels, or how much detail, is recorded in an image. The 2 most frequently used are 4K and 1080, though the GoPro HERO12 can record up to 5.3K. 4K resolution has about four times the detail of 1080, but the files are also much larger and more highly compressed, making them difficult to work with unless you are viewing/editing on a newer computer. We recommend always shooting at the highest resolution possible based on what your editing computer can handle. Frame rate is how many individual frames per second are recorded in your videos. The maximum amount of frames per second is directly associated to the resolution you have selected, with higher resolutions offering fewer frames per second than lower-resolution options. This is what you want to pay the most attention to when shooting super slow-motion footage, as you want as many frames as possible for the ability to slow the footage way down. We like to keep the frame rate set to 60 frames per second (the NTSC standard, Anti Flicker 60Hz) for general purposes. 60fps creates footage that looks super smooth and lifelike when played back at full speed, or it can be slowed down and played back at half speed (30fps) for an even more stabilized and lengthened effect. Note that if you’re shooting/editing in countries using the PAL standard (Anti Flicker 50Hz), your frame rates will be 25, 50, 100, and 200 frames per second versus North America’s NTSC standard of 24, 30, 60, 120, 240 frames per second. The fundamentals apply equally but the division of frames per second will be different (international editors should be aware of this). PRO TIP: You might choose to select 30fps instead of 60fps if you're diving in low light or dark conditions. By switching to 30fps the camera is going to default to a slower shutter speed, which allows your scene to be a little brighter. This is sometimes necessary if your footage is appearing too noisy and too grainy in dark situations. The tradeoff is that you lose those “extra” frames to create slow-motion footage from, but the improved image quality in low-light situations might justify that. 4K has about four times the resolution of 1080HD but also requires a more modern computer to edit, 5.3K even more so.Lens (Field of View) The lens setting, also known as the field of view (FOV), is what determines how wide or how narrow the view of the GoPro camera is. This is the setting that primarily determines whether you will be shooting wide angle or macro; wide angle is a wide view while macro requires the most narrow one possible. Set this to Wide when shooting wide angle. Do not set the lens any wider than this or the image will look too distorted and unnatural. Set the lens to Linear when shooting macro (we will also need to set the Zoom to 1.4x, more on that later). If the lens is kept too Wide when shooting macro the corners of the accessory +15 MACROMATE MINI lens will be visible in the shot, and the subject will be too small in the frame. Set the Lens setting to Wide for wide angle and Linear (plus Zoom 1.4x) for macro.Hypersmooth Hypersmooth is what GoPro calls the digital image stabilization. We recommend always keeping this turned ‘On’, and setting it to Boost where possible. This will crop in on the width of the shot, slightly reducing the field of view, but the massive benefit of the unbelievable stabilization that it adds is so good that we always take advantage of it. In fact, a reduced field of view is only a drawback for wide angle; it’s actually a benefit for macro because it produces a subject that appears larger in the frame. ProTune Settings Scroll down to access the ProTune Settings. These are the more advanced exposure, image quality, and sound settings. These will need to be assigned individually for each Custom Preset. These are basically the same for all of our recommended Custom Presets, but they will need to be individually assigned for each Preset. Set them as follows where applicable, and consult the specific Custom Preset section for each below or watch the video above for a more detailed explanation. 10-Bit: Off / On if you plan to color correct your footage during editingBitRate: HighShutter: AutoEV Comp: -0.5White Balance: AutoISO Min: 100ISO Max: 6400 (video) / 3200 (photo)Sharpness: MediumRAW Audio: OffWind: OffMedia Mod: Camera MicsPRO TIP: ISO is the camera’s sensitivity to light. The lower the value while recording, the better the image quality. GoPro cameras need A LOT of light to achieve a low ISO value while recording. The camera is always set to auto-ISO and you cannot tell what value it is self-assigning while recording. If diving under overcast skies, into a wreck, or fairly deep, you’ll want to use video lights instead of a filter to help brighten the scene. The ProTune settings are mostly the same for each Custom Preset but will have to be assigned individually for each as part of the creation process.Shortcuts Scroll down from ProTune to access the Shortcuts. Shortcuts are the icons present on the main shooting screen which allow you to quickly access your favorite features - while you're able to use the touch screen. Because the touchscreen is not accessible while in the GoPro Protective Housing, just turn all of the Shortcuts to ‘Off’ for a less cluttered main shooting screen. Shortcuts can’t be used while in the GoPro Protective Housing and just clutter up the screen, so turn them off for a cleaner view.Name & Save the Preset The final step in the creation process is to hit the ‘check mark’ icon in the upper right-hand corner to confirm your choices. Then you will be able to save the Custom Preset with a name and hit the ‘check mark’ again to save the Custom Preset. PRO TIP: The default names that GoPro includes for the Presets don’t really apply to what we’re creating them for. There is currently no way to create new names for Custom Presets, so just use “Custom” for each. This requires you to remember what each Preset is, but they at least display the resolution, frame rate, and lens setting which is all you really need to see to know what that Preset is for. BEST SETTINGSTHE BEST UNDERWATER SETTINGS FOR GOPROJump to a SectionVIDEO: WIDE ANGLEVIDEO: MACROVIDEO: SLOW MOTIONPHOTO: WIDE ANGLEPHOTO: MACRODOWNLOAD SETTINGS GUIDE PDFVIDEO SETTINGSWide Angle Video SettingsCustom Preset Name: CustomUse FLIP11 DIVE or DEEP FiltersUse lights in dark conditionsUse two lights for even scene coverageBasic SettingsMode: VideoAspect Ratio: 16:9Resolution: 5.3K, 4K, or 1080Frame Rate: 60fpsLens: WideHypersmooth: BoostScheduled Capture: N/ADuration: No LimitHindSight: OffTimer: OffZoom: 1.0xProTune Settings10-Bit: On if color correcting during editing, Off if notBitRate: HighShutter: AutoEV Comp: -0.5White Balance: AutoISO Min: 100ISO Max: 6400Sharpness: MediumColor: NaturalRAW Audio: OffWind: OffMedia Mod: Camera MicsShortcuts: Off When to Use Filters vs Video Lights GoPro has made large changes to the way that their cameras handle underwater color over the most recent camera models. As a result of that, we've modified the color of FLIP filters and the recommended depth ranges to better suit newer GoPro cameras. Consult the chart below for the recommended depth ranges and when to use video lights instead of a filter. PRO TIP: FLIP filters can produce great color below the 80-foot / 24-meter range, but the GoPro just can't handle it due to how little light is left at that depth. The GoPro sensor cannot collect enough ambient light through the filter so the results look soft, noisy, and dark. When shooting dark or deep we highly recommend removing the filter and switching to video lights for excellent-looking results. BACK TO SETTINGSMacro Video PresetCustom Preset Name: Custom 1Use +15 MACROMATE MINI Lens with Focus StickUse single video light in macro modeAdd a snoot to your light to darken the area around and behind the subjectBasic SettingsMode: VideoAspect Ratio: 16:9Resolution: 5.3K, 4K, or 1080Frame Rate: 60fpsLens: LinearHypersmooth: OnScheduled Capture: N/ADuration: No LimitHindSight: OffTimer: OffZoom: 1.4xProTune Settings10-Bit: On if color correcting during editing, Off if notBitRate: HighShutter: AutoEV Comp: -0.5White Balance: AutoISO Min: 100ISO Max: 6400 Sharpness: MediumColor: NaturalRAW Audio: OffWind: OffMedia Mod: Camera MicsShortcuts: Off Use the Focus Stick The key to using the macro mini successfully is to determine the focus distance to the subject using the included Focus Stick. Align the notch on the Focus Stick for your camera model with the front of the +15 MACROMATE MINI lens. The focus range is only about one inch and the Focus Stick is going to put you right in the middle of that range. Don't get significantly closer or farther away from your subject or focus will drop. Flip over to the +10 Close-Up lens in order to fit larger subjects into the frame. See how far away you need to be from the subject with the Focus StickBACK TO SETTINGSSlow Motion Video PresetCustom Preset Name: Custom 2Use this setting for fast action scenesUse a FLIP filter at the recommended depthUse lights in dark environmentsThe more frames per second, the betterBasic SettingsMode: VideoAspect Ratio: 16:9Resolution: 2.7K or 1080Frame Rate: 240fpsLens: WideHypersmooth: BoostScheduled Capture: N/ADuration: No LimitHindSight: OffTimer: OffZoom: 1.0xProTune Settings10-Bit: N/A (Only available in 4K)BitRate: HighShutter: AutoEV Comp: -0.5White Balance: AutoISO Min: 100ISO Max: 6400 Sharpness: MediumColor: NaturalRAW Audio: OffWind: OffMedia Mod: Camera MicsShortcuts: Off Slow-Motion Shooting Tips The main difference between shooting super slow motion footage and regular wide angle is the tradeoff between shooting way faster frame rates at lower resolutions. By selecting a lower resolution of 2.7K or even 1080, we can unlock a much faster frame rate up to 240 frames per second. This allows you to stretch clips out even more for those short moments of fast action. Use these settings when you're jumping off the boat and splashing into the water! You are going to need some knowledge of editing software and a reasonably powerful computer to do this. BACK TO SETTINGSPHOTO SETTINGS While the GoPro can take photos, it's primarily a video camera. There are too many limitations that prohibit it from being a serious photo rig. It can't synchronize with strobes, so you're limited to video lights for lighting. You can't pre-focus your shots so your autofocus is quite limited, and certain settings in the camera prevent it from shooting at maximum image quality in all modes. If your primary goal is photography it's worth taking a look at cameras that really specialize more in that realm. That being said, here's how you make the most of the GoPro for basic point and shoot photos. Wide Angle Photo PresetCustom Preset Name: CustomUse FLIP11 DIVE or DEEP FiltersUse lights in dark conditionsSet to RAW for best qualityBasic SettingsMode: PhotoLens: WideOutput: RAW or StandardScheduled Capture: N/ATimer: OffZoom: 1.0xProTune SettingsEV Comp: -0.5White Balance: AutoISO Min: 100ISO Max: 3200 Sharpness: MediumColor: NaturalShortcuts: Off BACK TO SETTINGSMacro Photo PresetCustom Preset Name: Custom 1Use +15 MACROMATE MINI Lens with Focus StickUse single video light in macro modeAdd a snoot to your light to darken the area around and behind the subjectBasic SettingsMode: PhotoLens: LinearOutput: StandardScheduled Capture: N/ATimer: OffZoom: 2.0xProTune SettingsEV Comp: -0.5White Balance: AutoISO Min: 100ISO Max: 3200 Sharpness: MediumColor: NaturalShortcuts: Off BACK TO SETTINGSDownload a copy of these settings to save and share. DOWNLOAD HERE If you have any questions send us an email at info@backscatter.com, or give us a call and we’ll be happy to help you out. Be sure to also check out our GoPro Solutions article to learn all about the FLIP Filter product line and the full suite of accessories for GoPro underwater. Why buy direct from Backscatter?Free lifetime tech support with every purchase. We will beat any advertised price. Free shipping to USA and Canada and low-cost international shipping. GOPRO HERO13The GoPro HERO13 CameraGoPro HERO13 Black Camera $399.99ORDER NOWThe GoPro HERO 13 Underwater HousingsGoPro Protective Housing for HERO9, HERO10, HERO11, HERO12, & HERO13 $54.99ORDER NOWIsotta GoPro Housing for HERO9, HERO10, HERO11, HERO12, & HERO13 $514.80ORDER NOWRecsea SVH-HERO13-M Housing for HERO9, HERO10, HERO11, HERO12, & HERO13 $750.00ORDER NOWAnglerfish AFCL-GP9 Housing for HERO9, HERO10, HERO11, HERO12, & HERO13 $850.00ORDER NOWAnglerfish AFCL-GP9-F570 Housing for HERO9, HERO10, HERO11, HERO12, & HERO13 $1,650.00ORDER NOWAOI UH-GPX Housing for HERO9, HERO10, HERO11, HERO12, & HERO13 $1,999.00ORDER NOWOutfit Your GoPro With Our Popular PackagesBackscatter Sharp Wide Lens Pro $199.00ORDER NOWBackscatter Sharp Wide Lens Pro Kit Regular Price: $298.00 Sale Price: $289.00You Save: $9.00ORDER NOWBackscatter Sharp Wide Lens Pro Package Regular Price: $337.95 Sale Price: $299.00You Save: $38.95ORDER NOWFLIP13 One Filter Kit Color Correction System with DIVE Filter $79.00ORDER NOWFLIP13 Two Filter Kit with DIVE & DEEP Color Correction Filters $119.00ORDER NOWFLIP13 Pro Package with DIVE & DEEP Filters and +15 MACROMATE Mini Regular Price: $268.00 Sale Price: $249.00You Save: $19.00ORDER NOWFLIP Wide Angle Blue Water PackageORDER NOWFLIP Wide and Macro PackageORDER NOWFLIP Macro Addict PackageORDER NOWFLIP Color Corrections Filters FLIP DIVE filter Bluewater Color Correction Red FilterORDER NOW FLIP DEEP filter Bluewater Color Correction Red FilterORDER NOW FLIP FLUORESCENCE FilterORDER NOWFLIP5 55MM Threaded DIVE Color Correction FilterORDER NOWFLIP5 55MM Threaded DEEP Color Correction FilterORDER NOWClose Focus and Macro Correction Lenses FLIP 55MM +10 Close-Up Lens $24.95ORDER NOW +15 MACROMATE MINI Macro Lens & FLIP 55mm Adaptor $149.00ORDER NOW Backscatter 55mm Lens QRS-02 Mount Adapter +15 MACROMATE MINI Lens $49.00ORDER NOWFLIP Adapters & Accessories FLIP 55MM Filter HolderORDER NOWFLIP FILTERS Neoprene Protective PouchORDER NOWFLIP FILTERS Neoprene Protective Wallet for FiltersORDER NOW
Related Posts
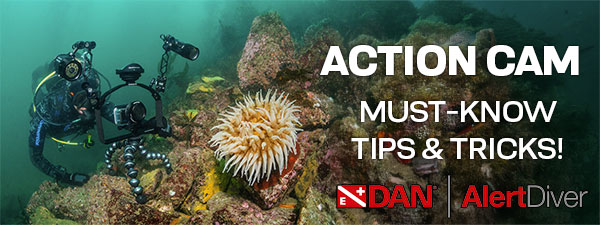
Best Underwater Action Camera Settings Guide
What kind of action camera diver are you? Do you capture clips here and there on your dive, spend your entire time underwater shooting video, or use an action camera alongside a larger, dedicated came...
Read More 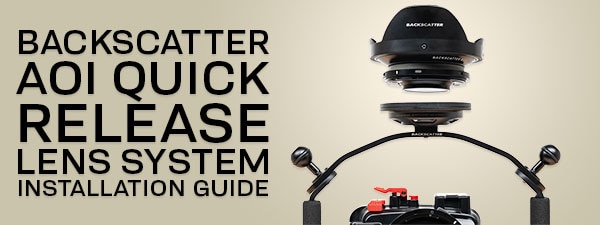
Backscatter AOI QRS Quick Release Lens System Installation Guide
The AOI Quick Release System (QRS) offers a convenient way to store and swap lenses for AOI and Backscatter lenses. When used with the Backscatter Double Handle and Tray and The Arch, the system posit...
Read More 
Complete Guide For GoPro HERO13 Best Underwater Video & Photo Settings
The GoPro HERO 13 Black is the best camera from GoPro to date and is our favorite action camera. The GoPro HERO13 has upgraded battery life for longer shoots, super smooth image stabilization, and a s...
Read More 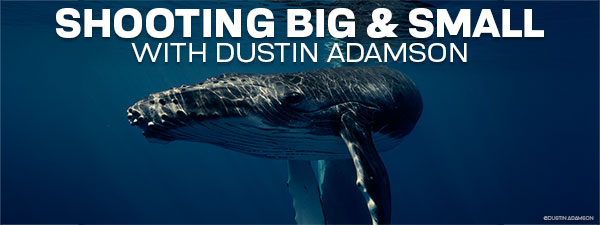
Interviews with the Pros: Shooting Subjects Big and Small with Dustin Adamson
From humpback whales to nudibranchs, tiger sharks to flamboyant cuttlefish, Dustin Adamson has shot it all. In this interview, Dustin shares key insights on the gear he uses, as well as his process an...
Read More 
Remote Lighting with Backscatter Hybrid Flash, Atom Flash, Mini Flash 3, & Mini Flash 2 Underwater Guide
One of the standout features of the Hybrid Flash and Mini Flash 2 is Remote Mode. Unlike a simple slave mode, Remote Mode allows for remote triggering and adjustment of power levels on an off-camera H...
Read More 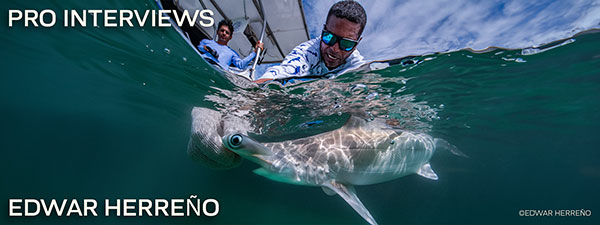
Documenting Marine Conservation with Edwar Herreño
Backscatter pro client and affiliate Edwar Herreno is a marine biologist, technical diving instructor, conservationist, and award-winning freelance underwater photographer and filmmaker. His work has ...
Read More